Dual booting Arch and Windows 11
Prerequisites
Before installing arch we need to do the following things
Disk partition
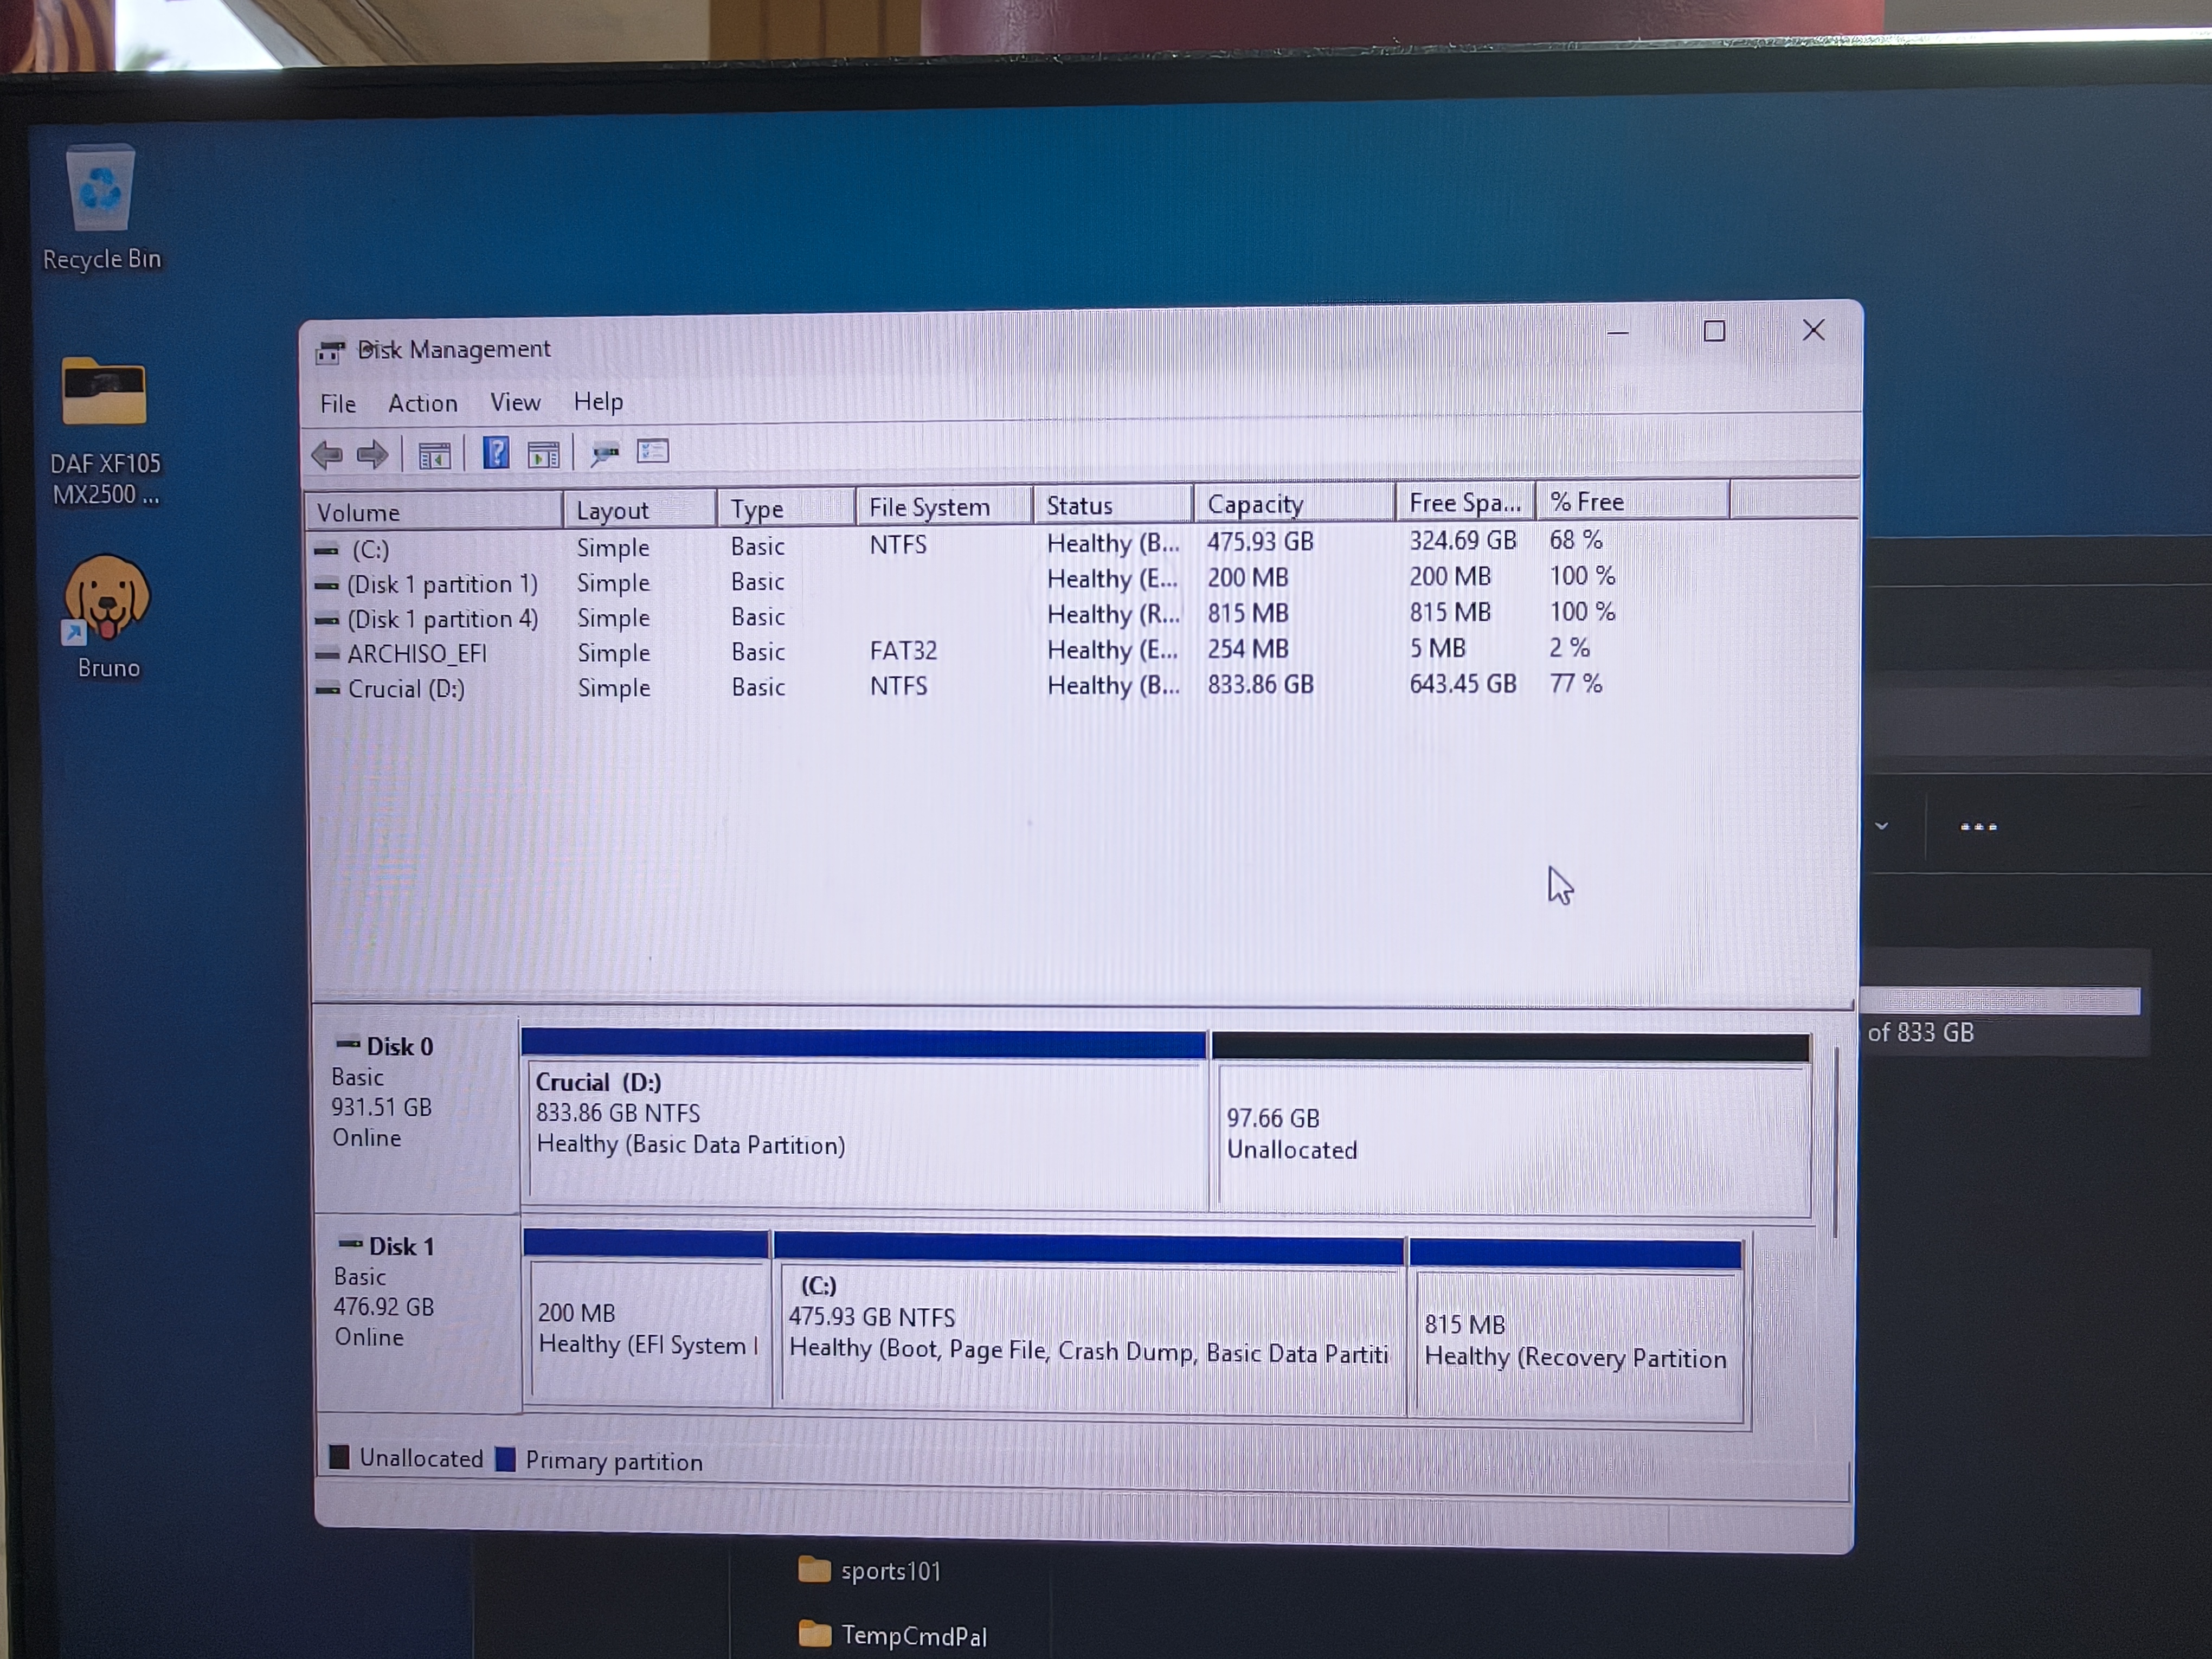
We’ll need to make a disk partition in windows 11 before proceeding to make sure both the OS run isolated, this can be done by the following steps
- Right-click on the Start menu and select Disk Management. Alternatively, you can press
Win + Xand choose Disk Management from the list. - In the Disk Management window, locate the drive you want to partition (usually the C: drive). In my case I’ve installed in D drive on a separate disk
- Right-click on the drive and select Shrink Volume
- In the dialog that appears, enter the amount of space to shrink (in MB). This will be the size of the new partition for Arch Linux. Make sure to leave enough space for Windows. In my case I’ve allocated 100 gigs for Arch.
- Click Shrink. The unallocated space will appear in the Disk Management window.
Bios settings
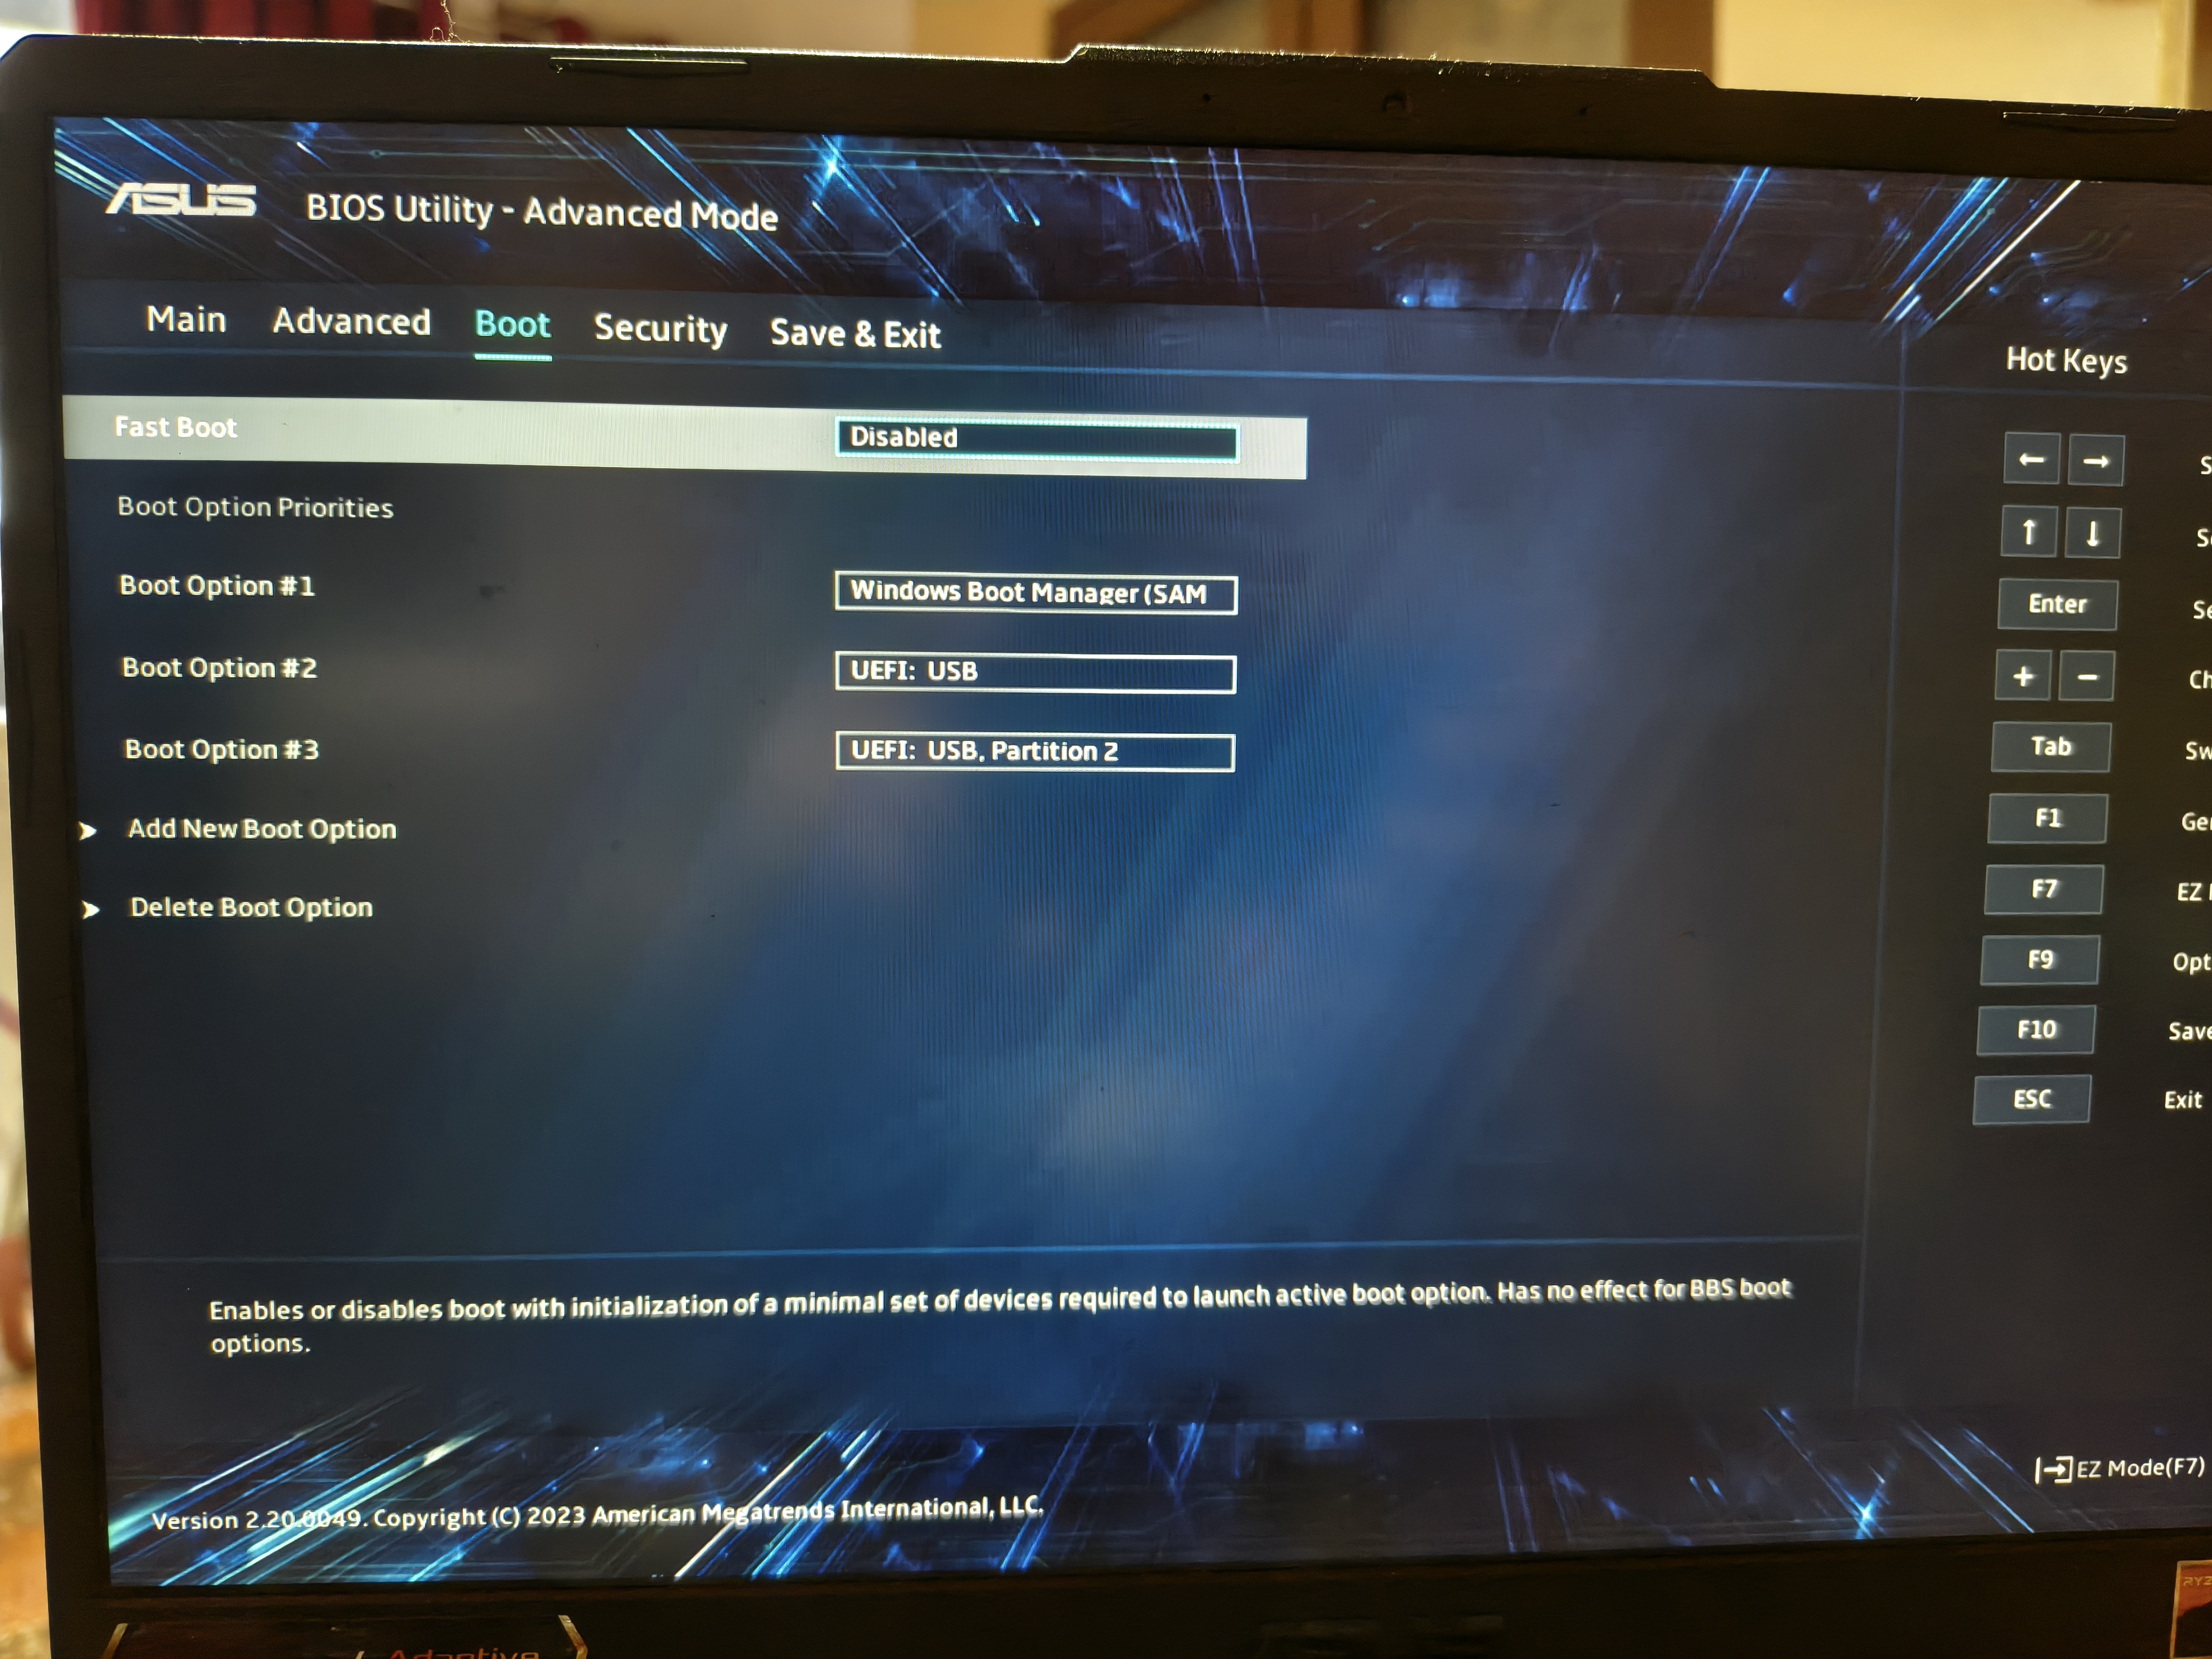
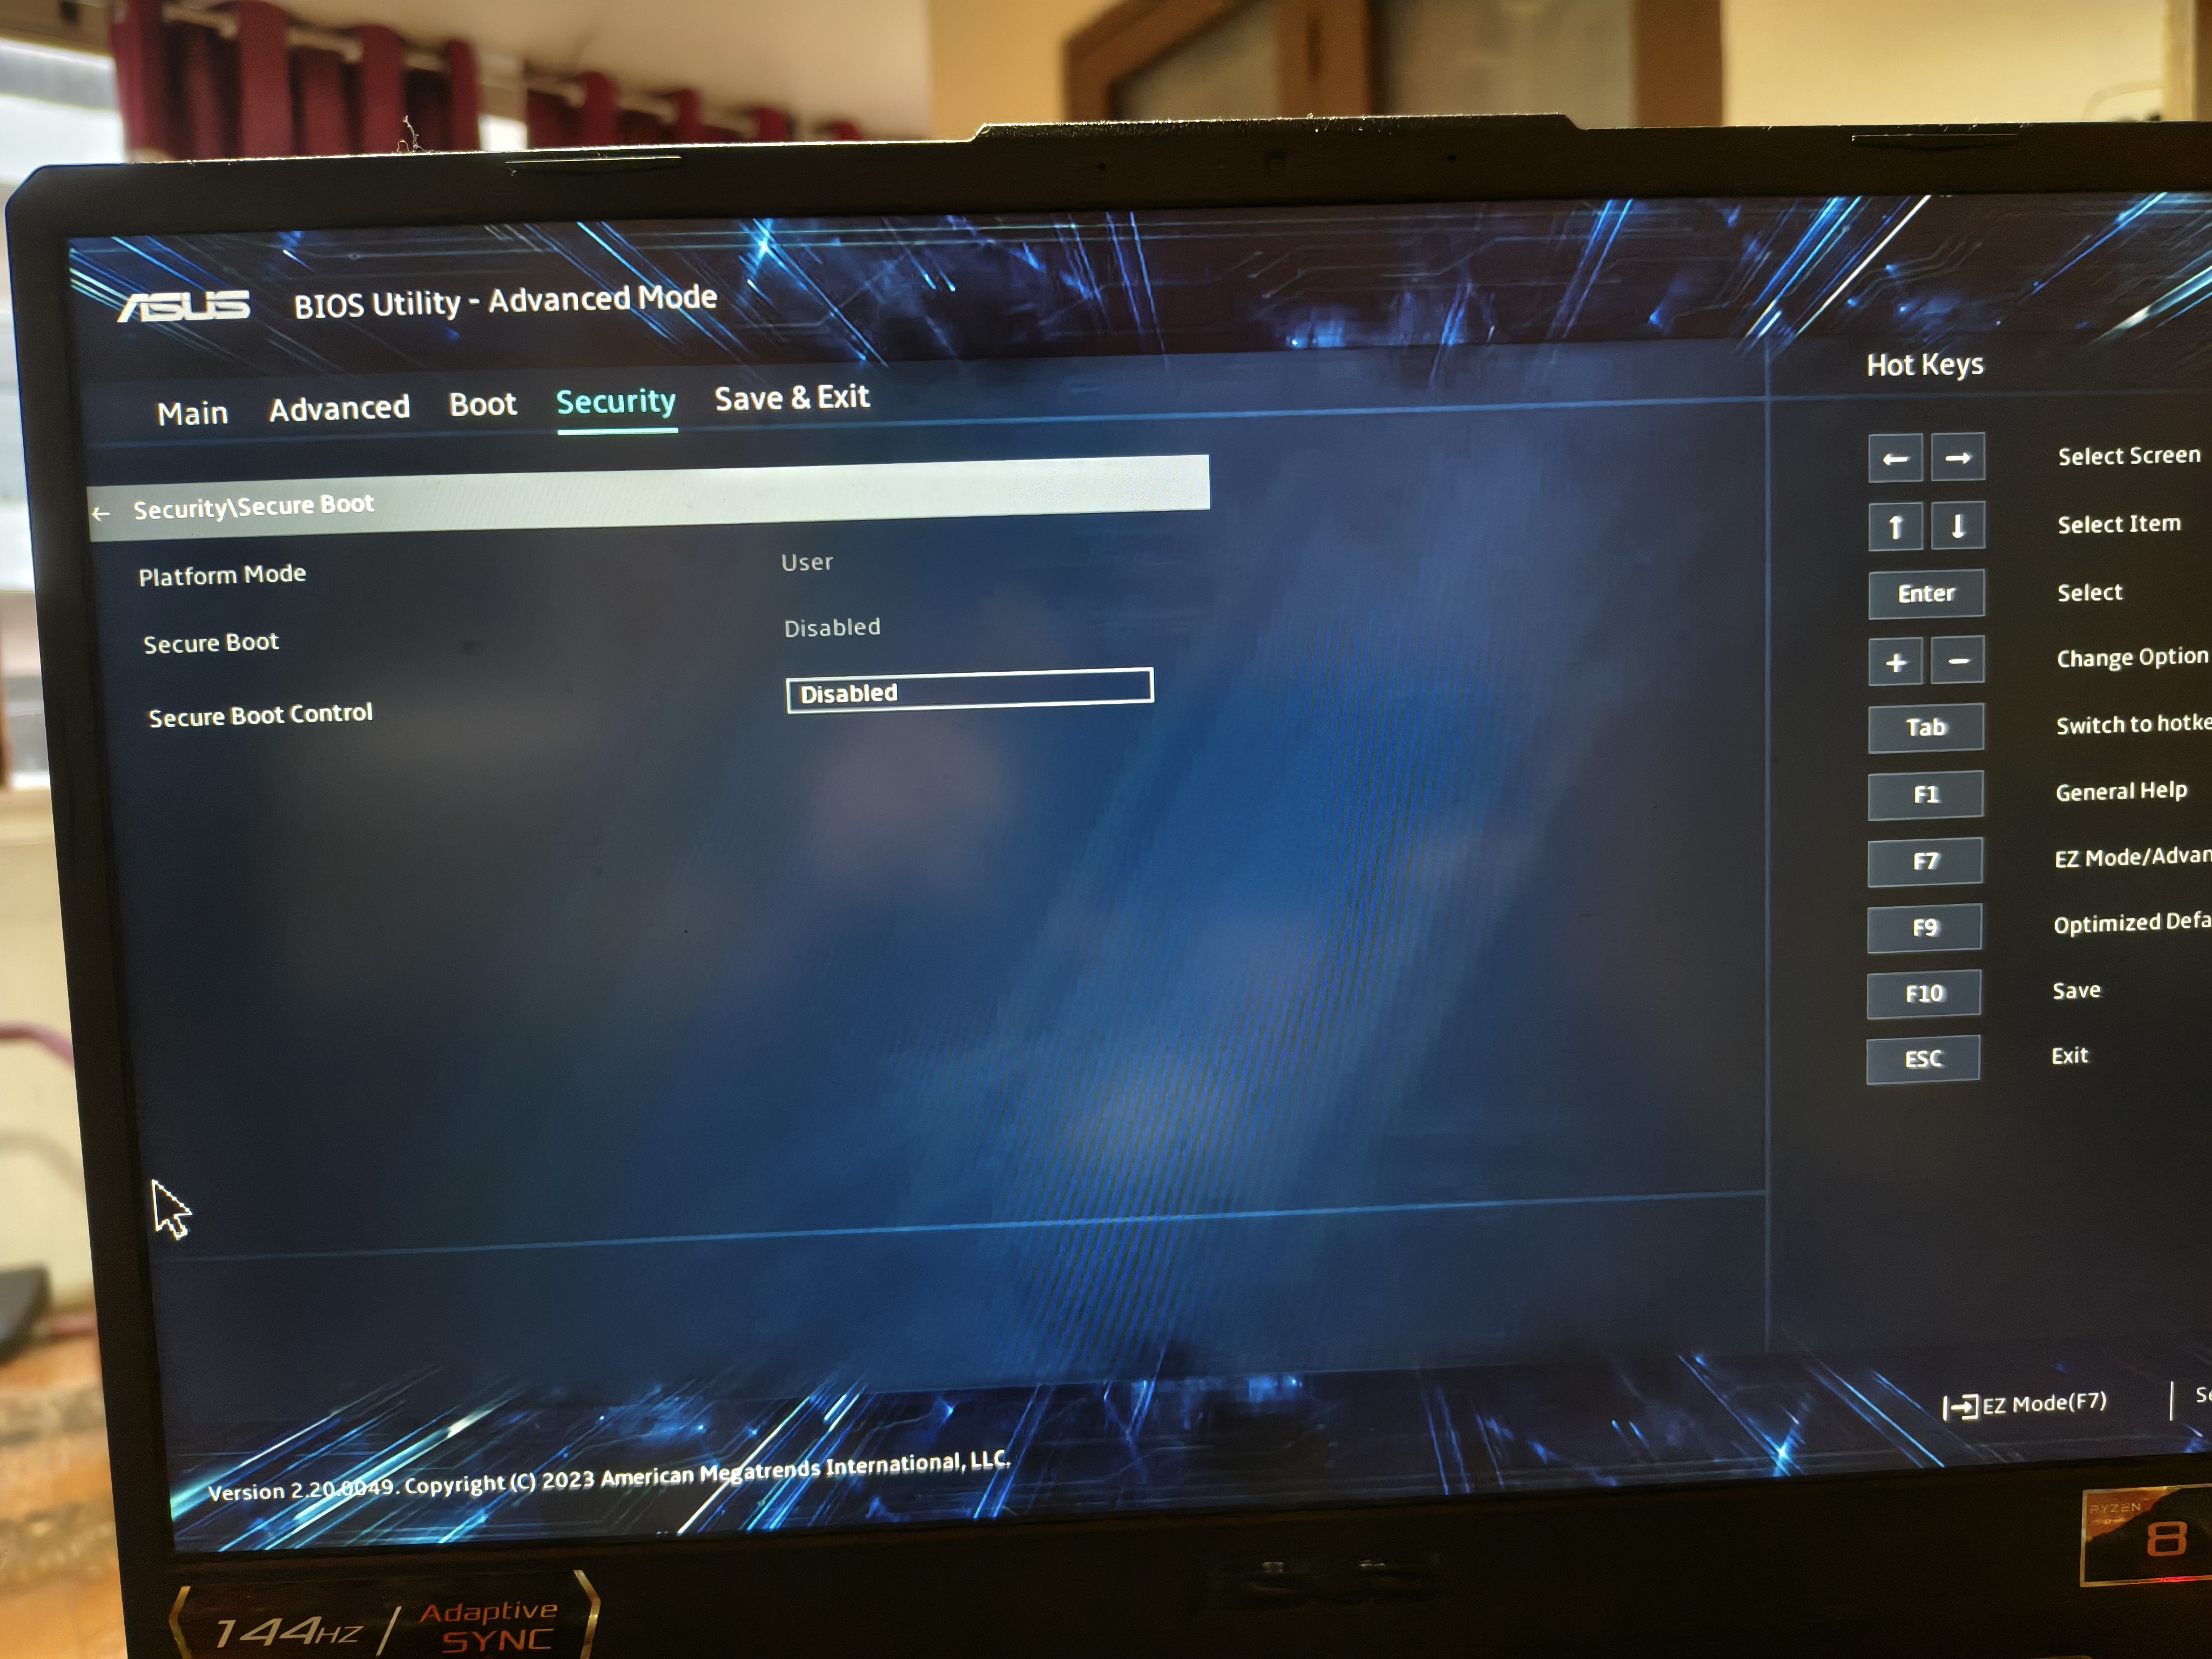
Bios can be accessed by pressing Esc, F10, F2, F12 key on your keyboard while booting, please check your motherboard manufacturer or laptop to check it.
- Disable Fast Startup
- Disable secure boot
Arch ISO setup
- Download arch ISO from the official site.
- Install a tool such as Rufus or Etcher and burn the ISO onto a USB drive.
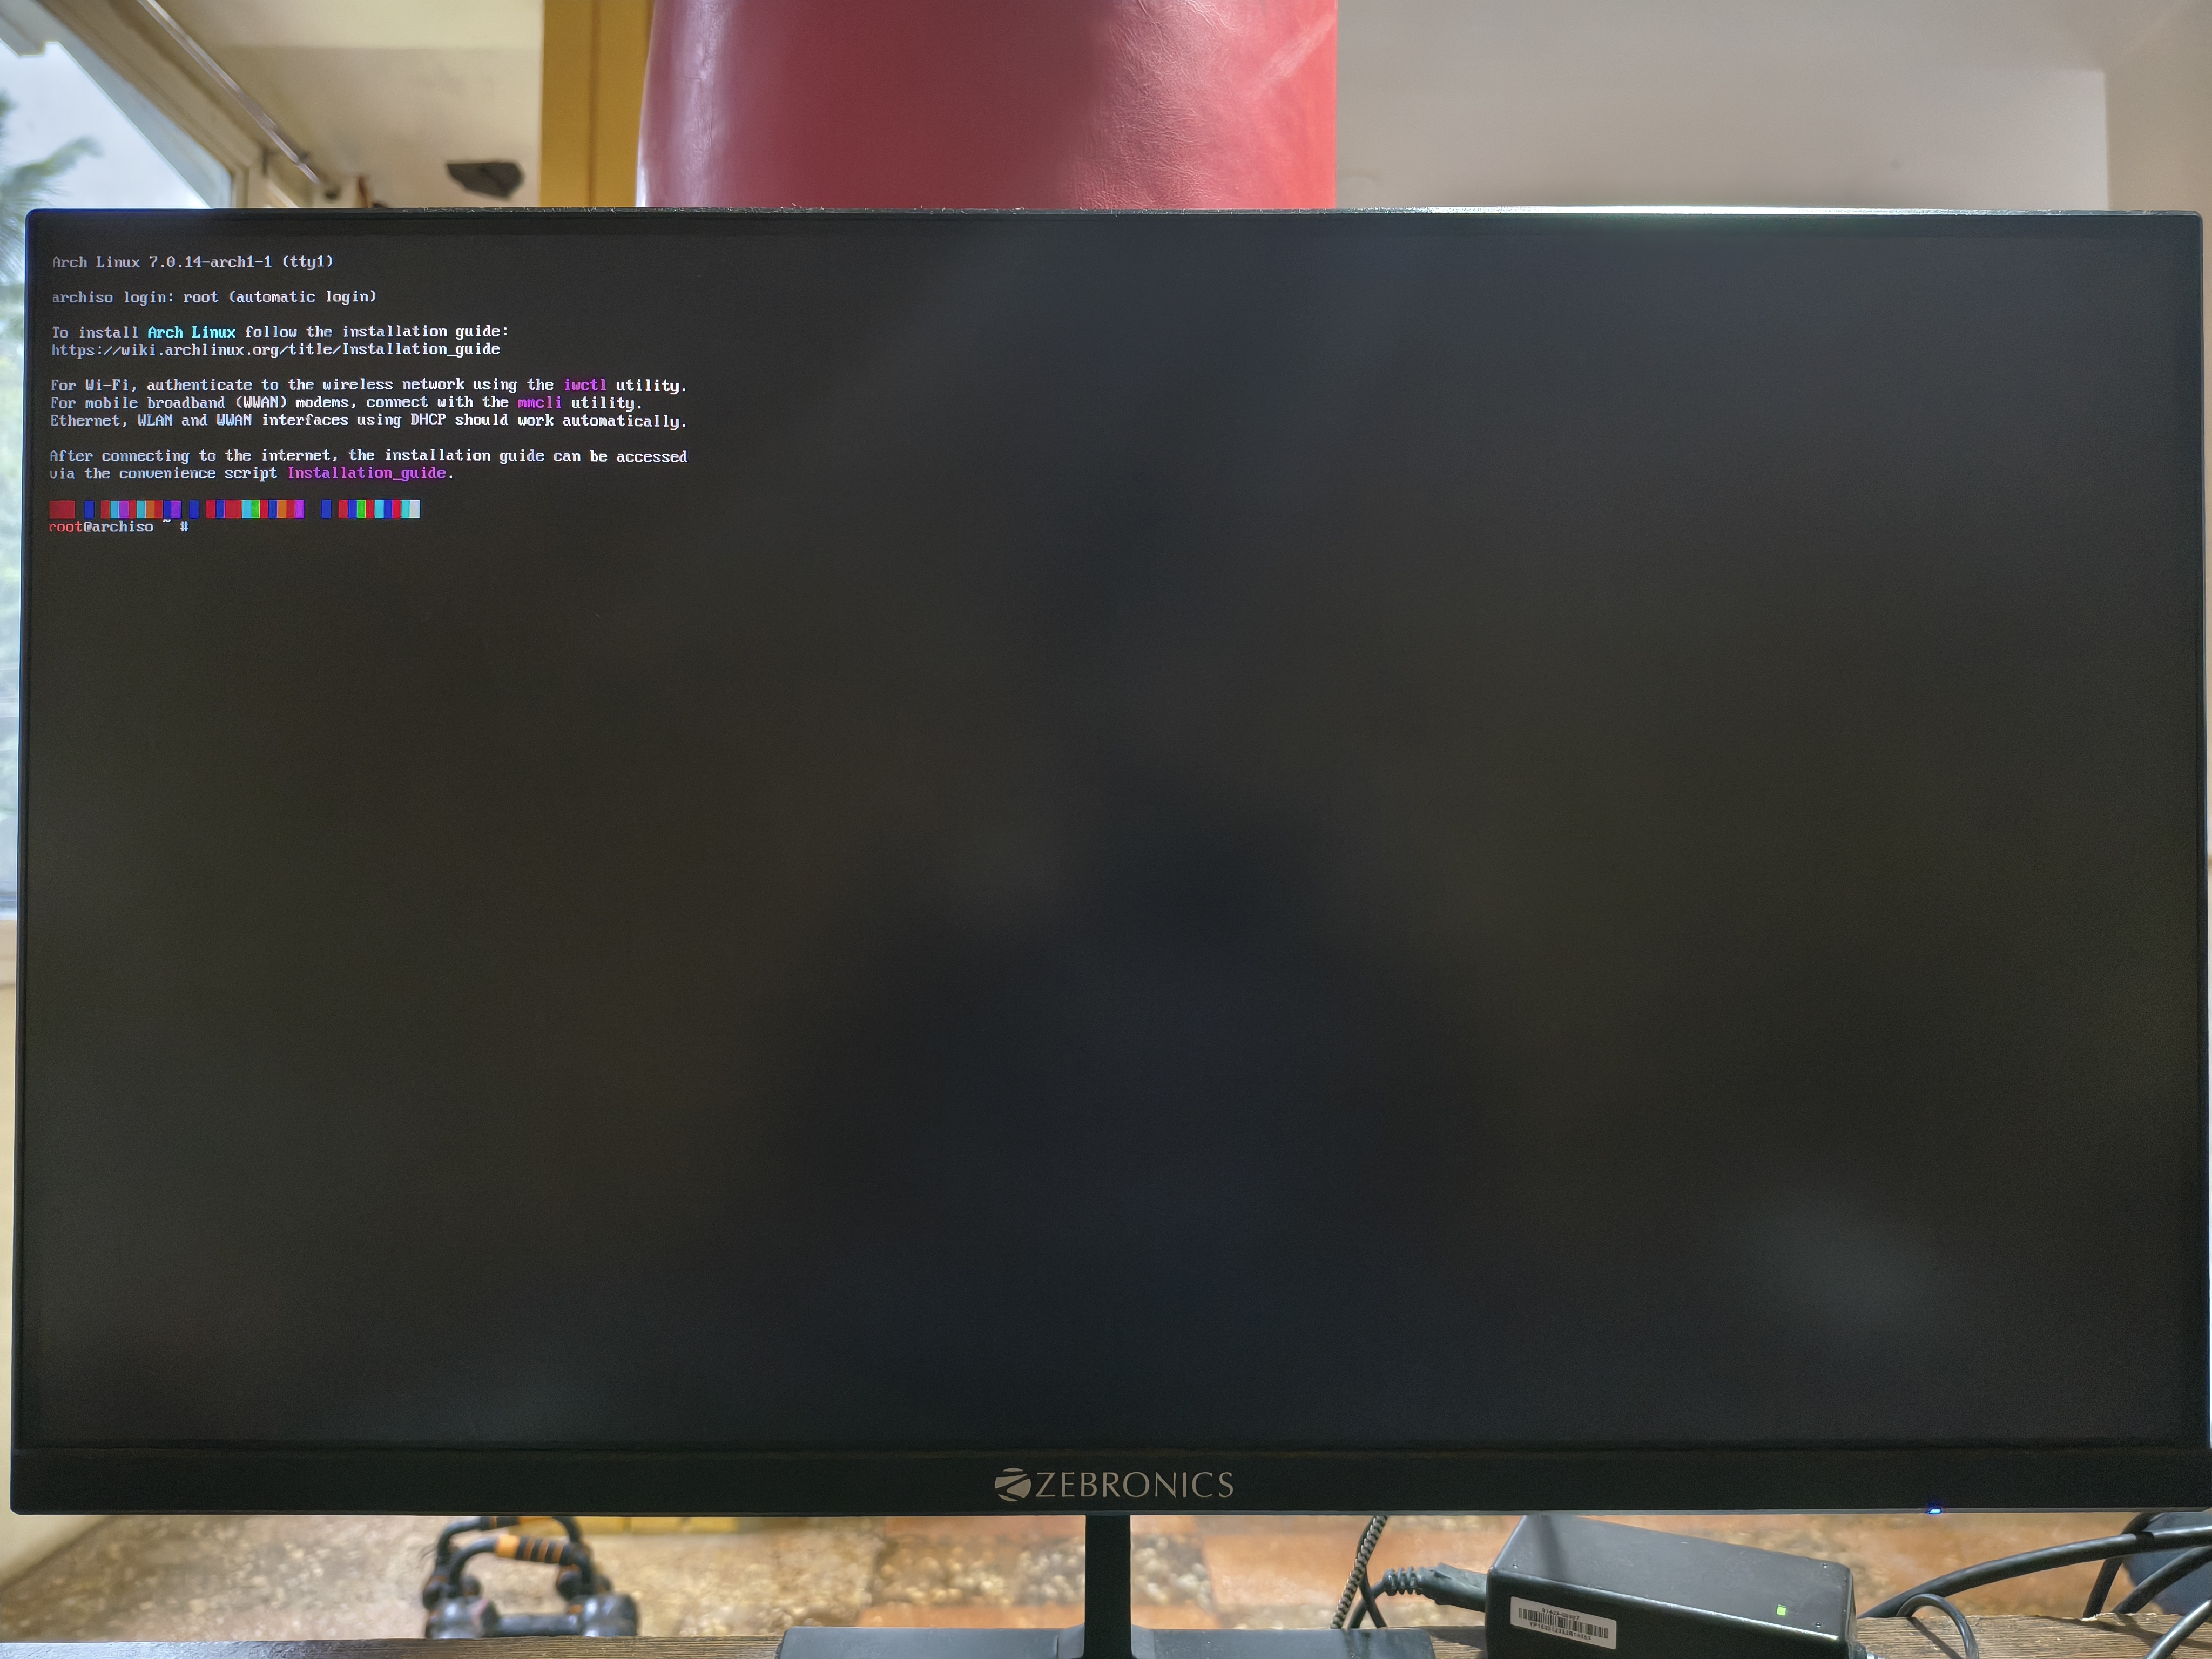
Booting onto Arch
- Insert the drive into the computer
- Restart the computer into the BIOS/UEFI/Bootloader menu
- Select the boot option as the USB drive
Installing Arch
If you reached this step, it’s likely that you’ve done the following
- Reserved free storage in one of your windows disks
- Downloaded archlinux iso
- Made a bootable flash drive via Rufus, Balenaetcher, Raspberry Pi imager or any other software
- Rebooted the PC and selected the drive in the BIOS/UEFI
- You can see the arch terminal
Configuring the storage
- Provided you’ve set up free storage in Windows disk manager you have to set up the following
The drives are not set up inially despite allocating free space in the windows disk manager, to do this you have to let the linux filesystem aware of the availablity of the free storage available. To do this follow the following steps
Type in
lsblk: After running this command you may see the avalable spaces. In the windows disk manager we had cleared out 97GB of storage, however we wont see it directly.Type in
cfdisk/dev/<your-drive-name: In my case it was/dev/nvme1n1p1, drive letters will be different for each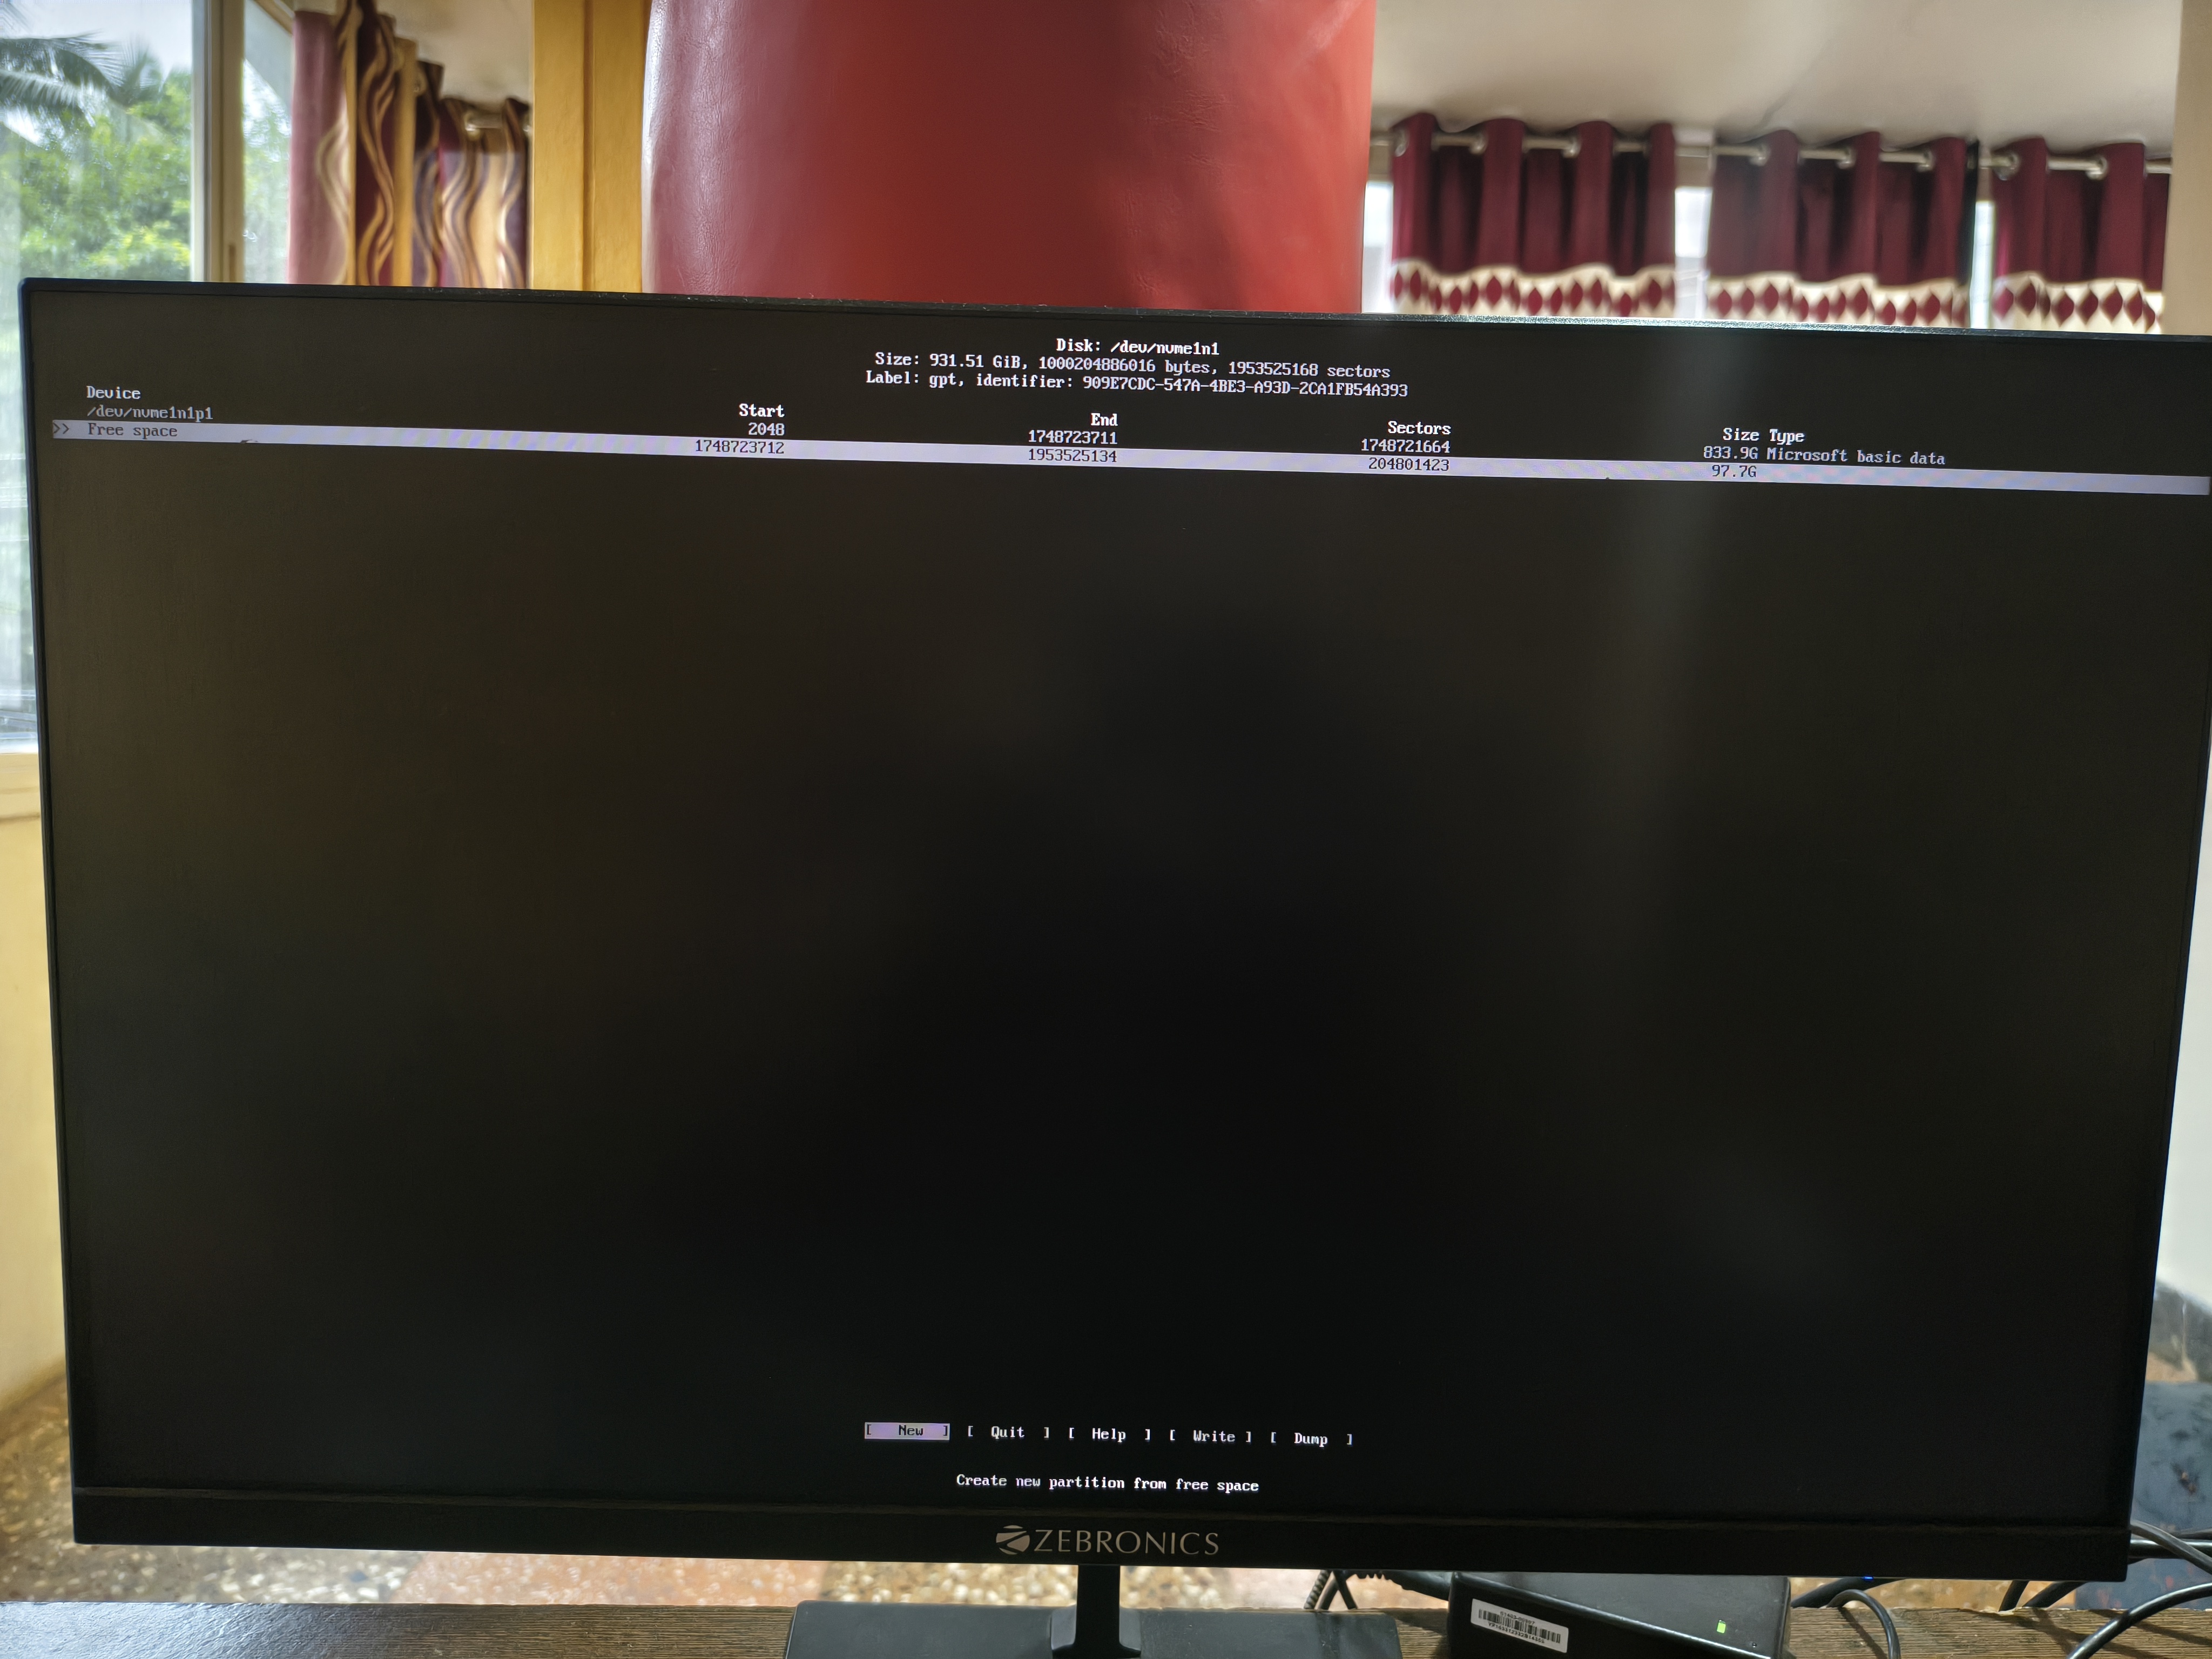
Type in new and create two seperate partitions out of your reserved space. The partitions can be editing by using edit in the terminal utility
- Partition 1
- Type: EFI System
- Size: 1GB
- Partition 2
- Type: Linux filesystem
- Size: The rest of your reserved space
Click on Write after doing this setup.
WARNING: Be careful when using write, all the data within this volume will be deleted.
Here is how it’ll look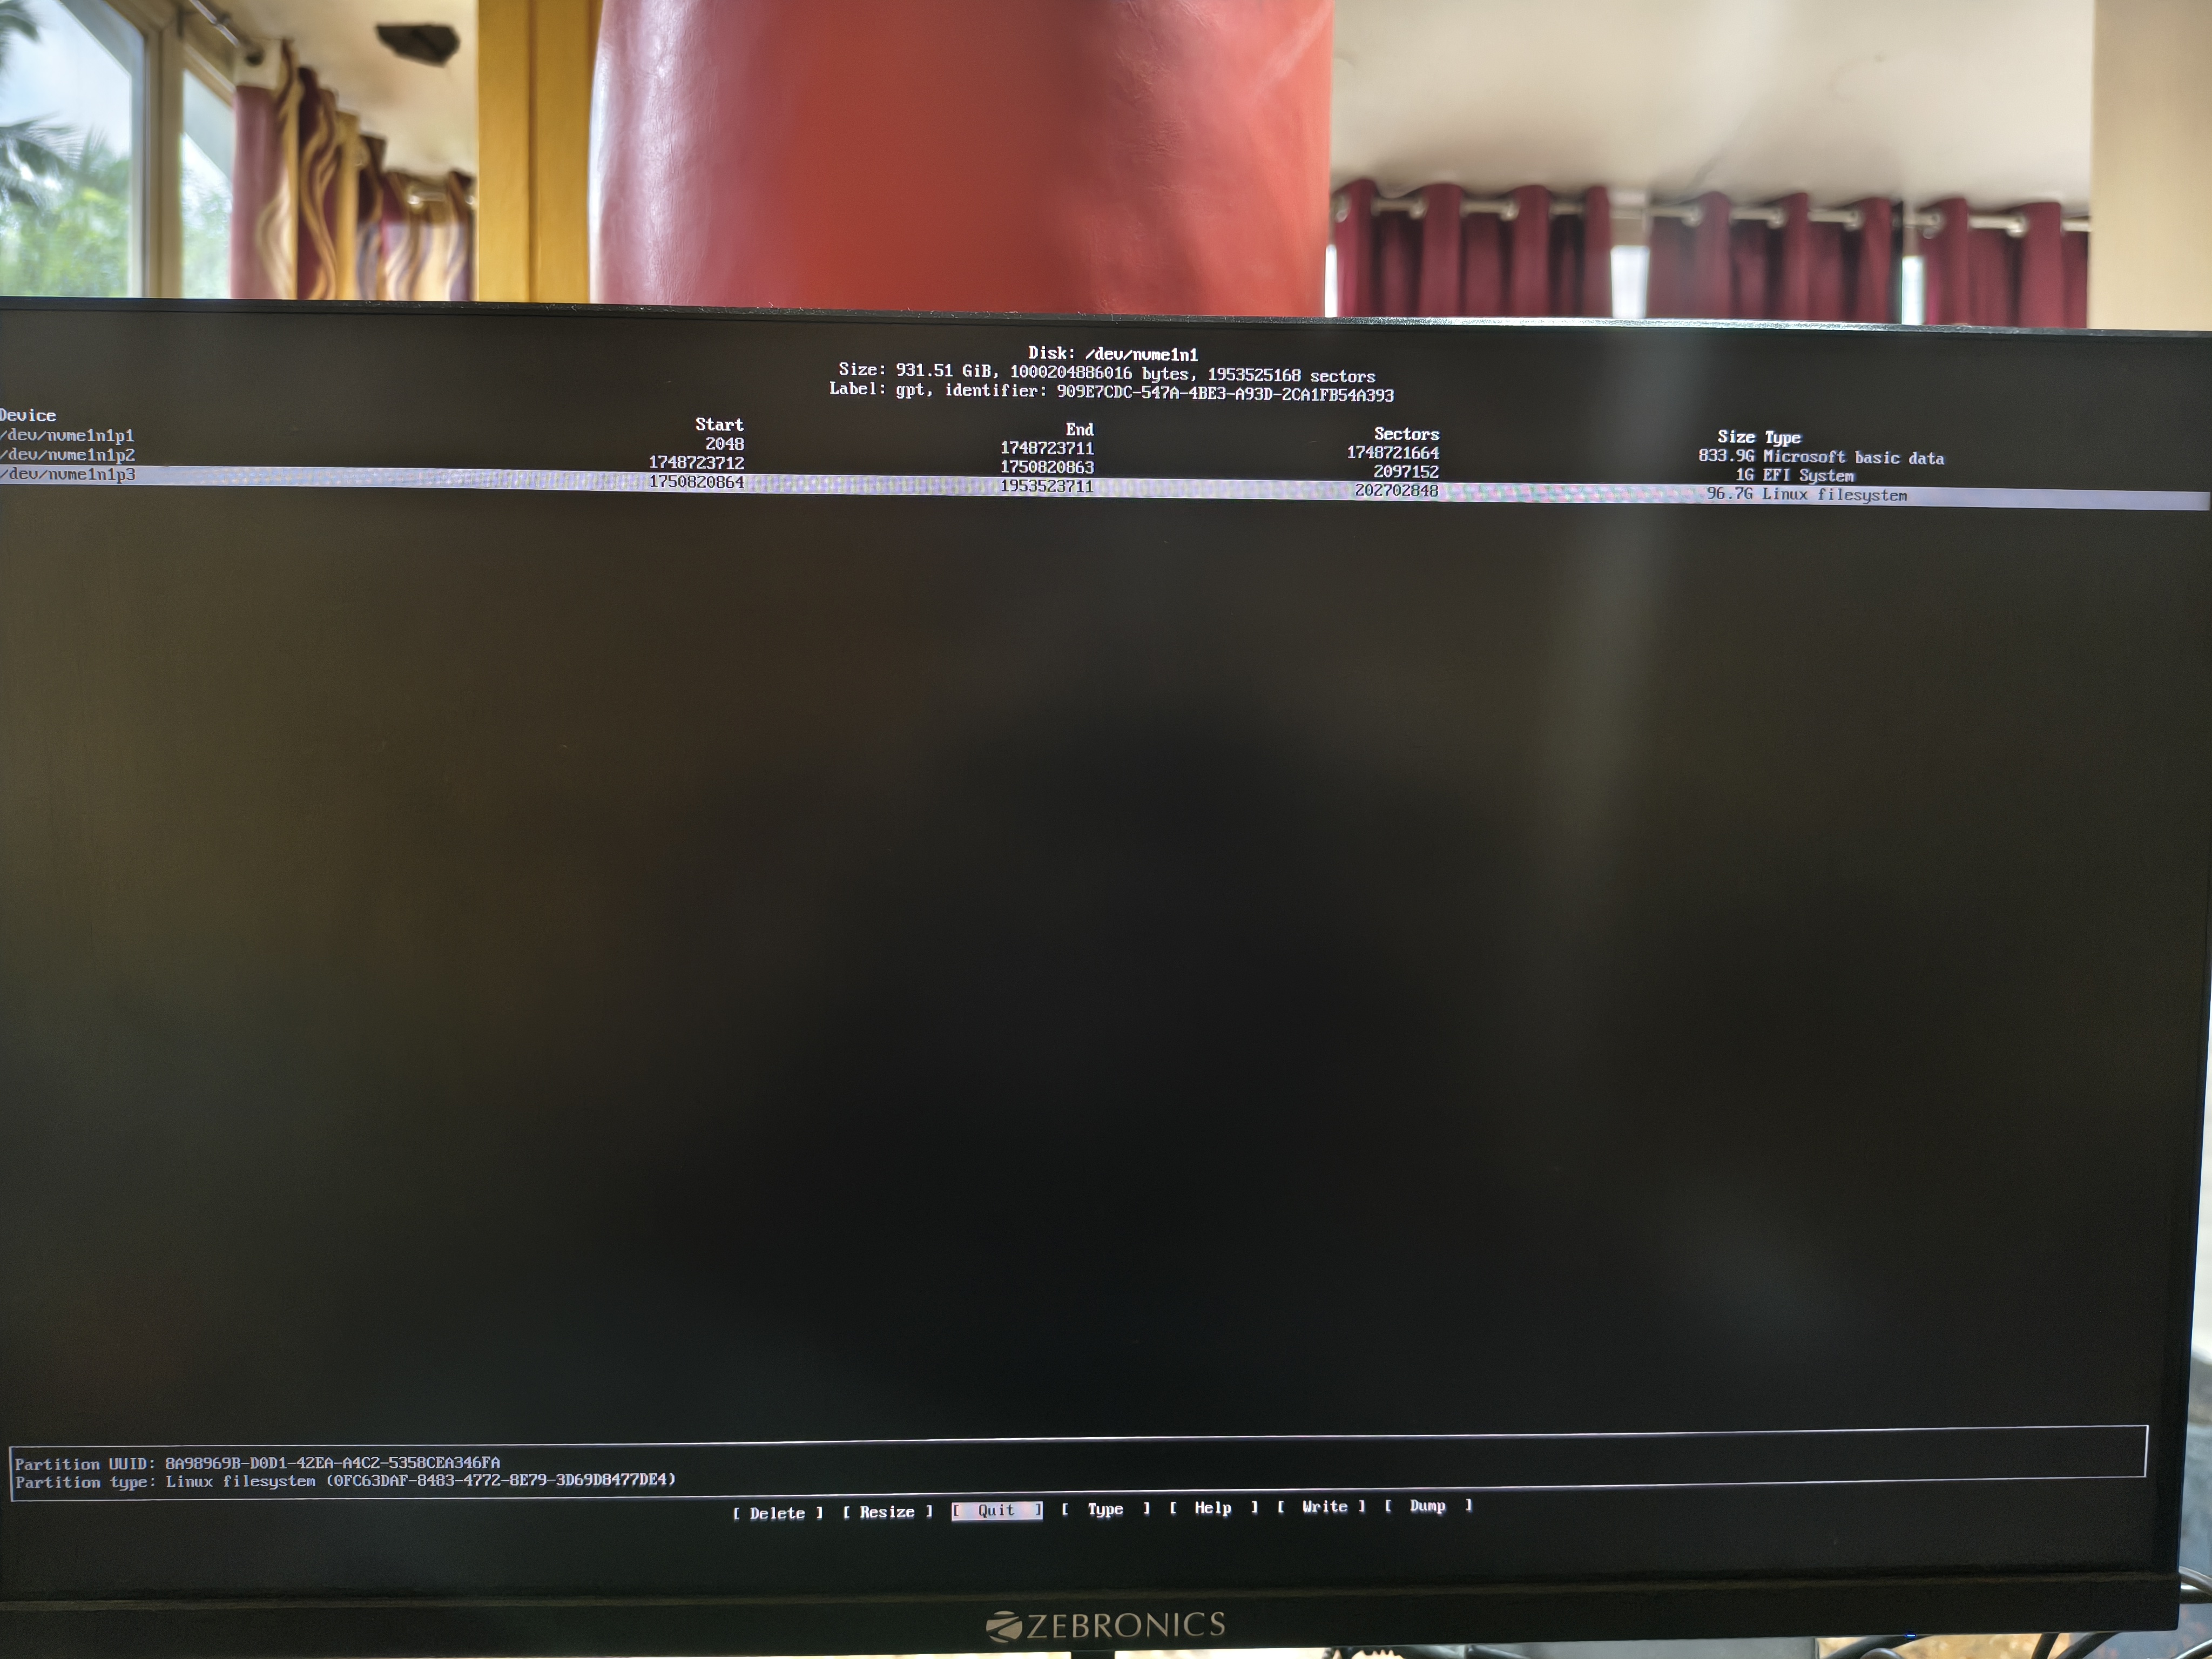 Type in
 lsblkto verify the new partitions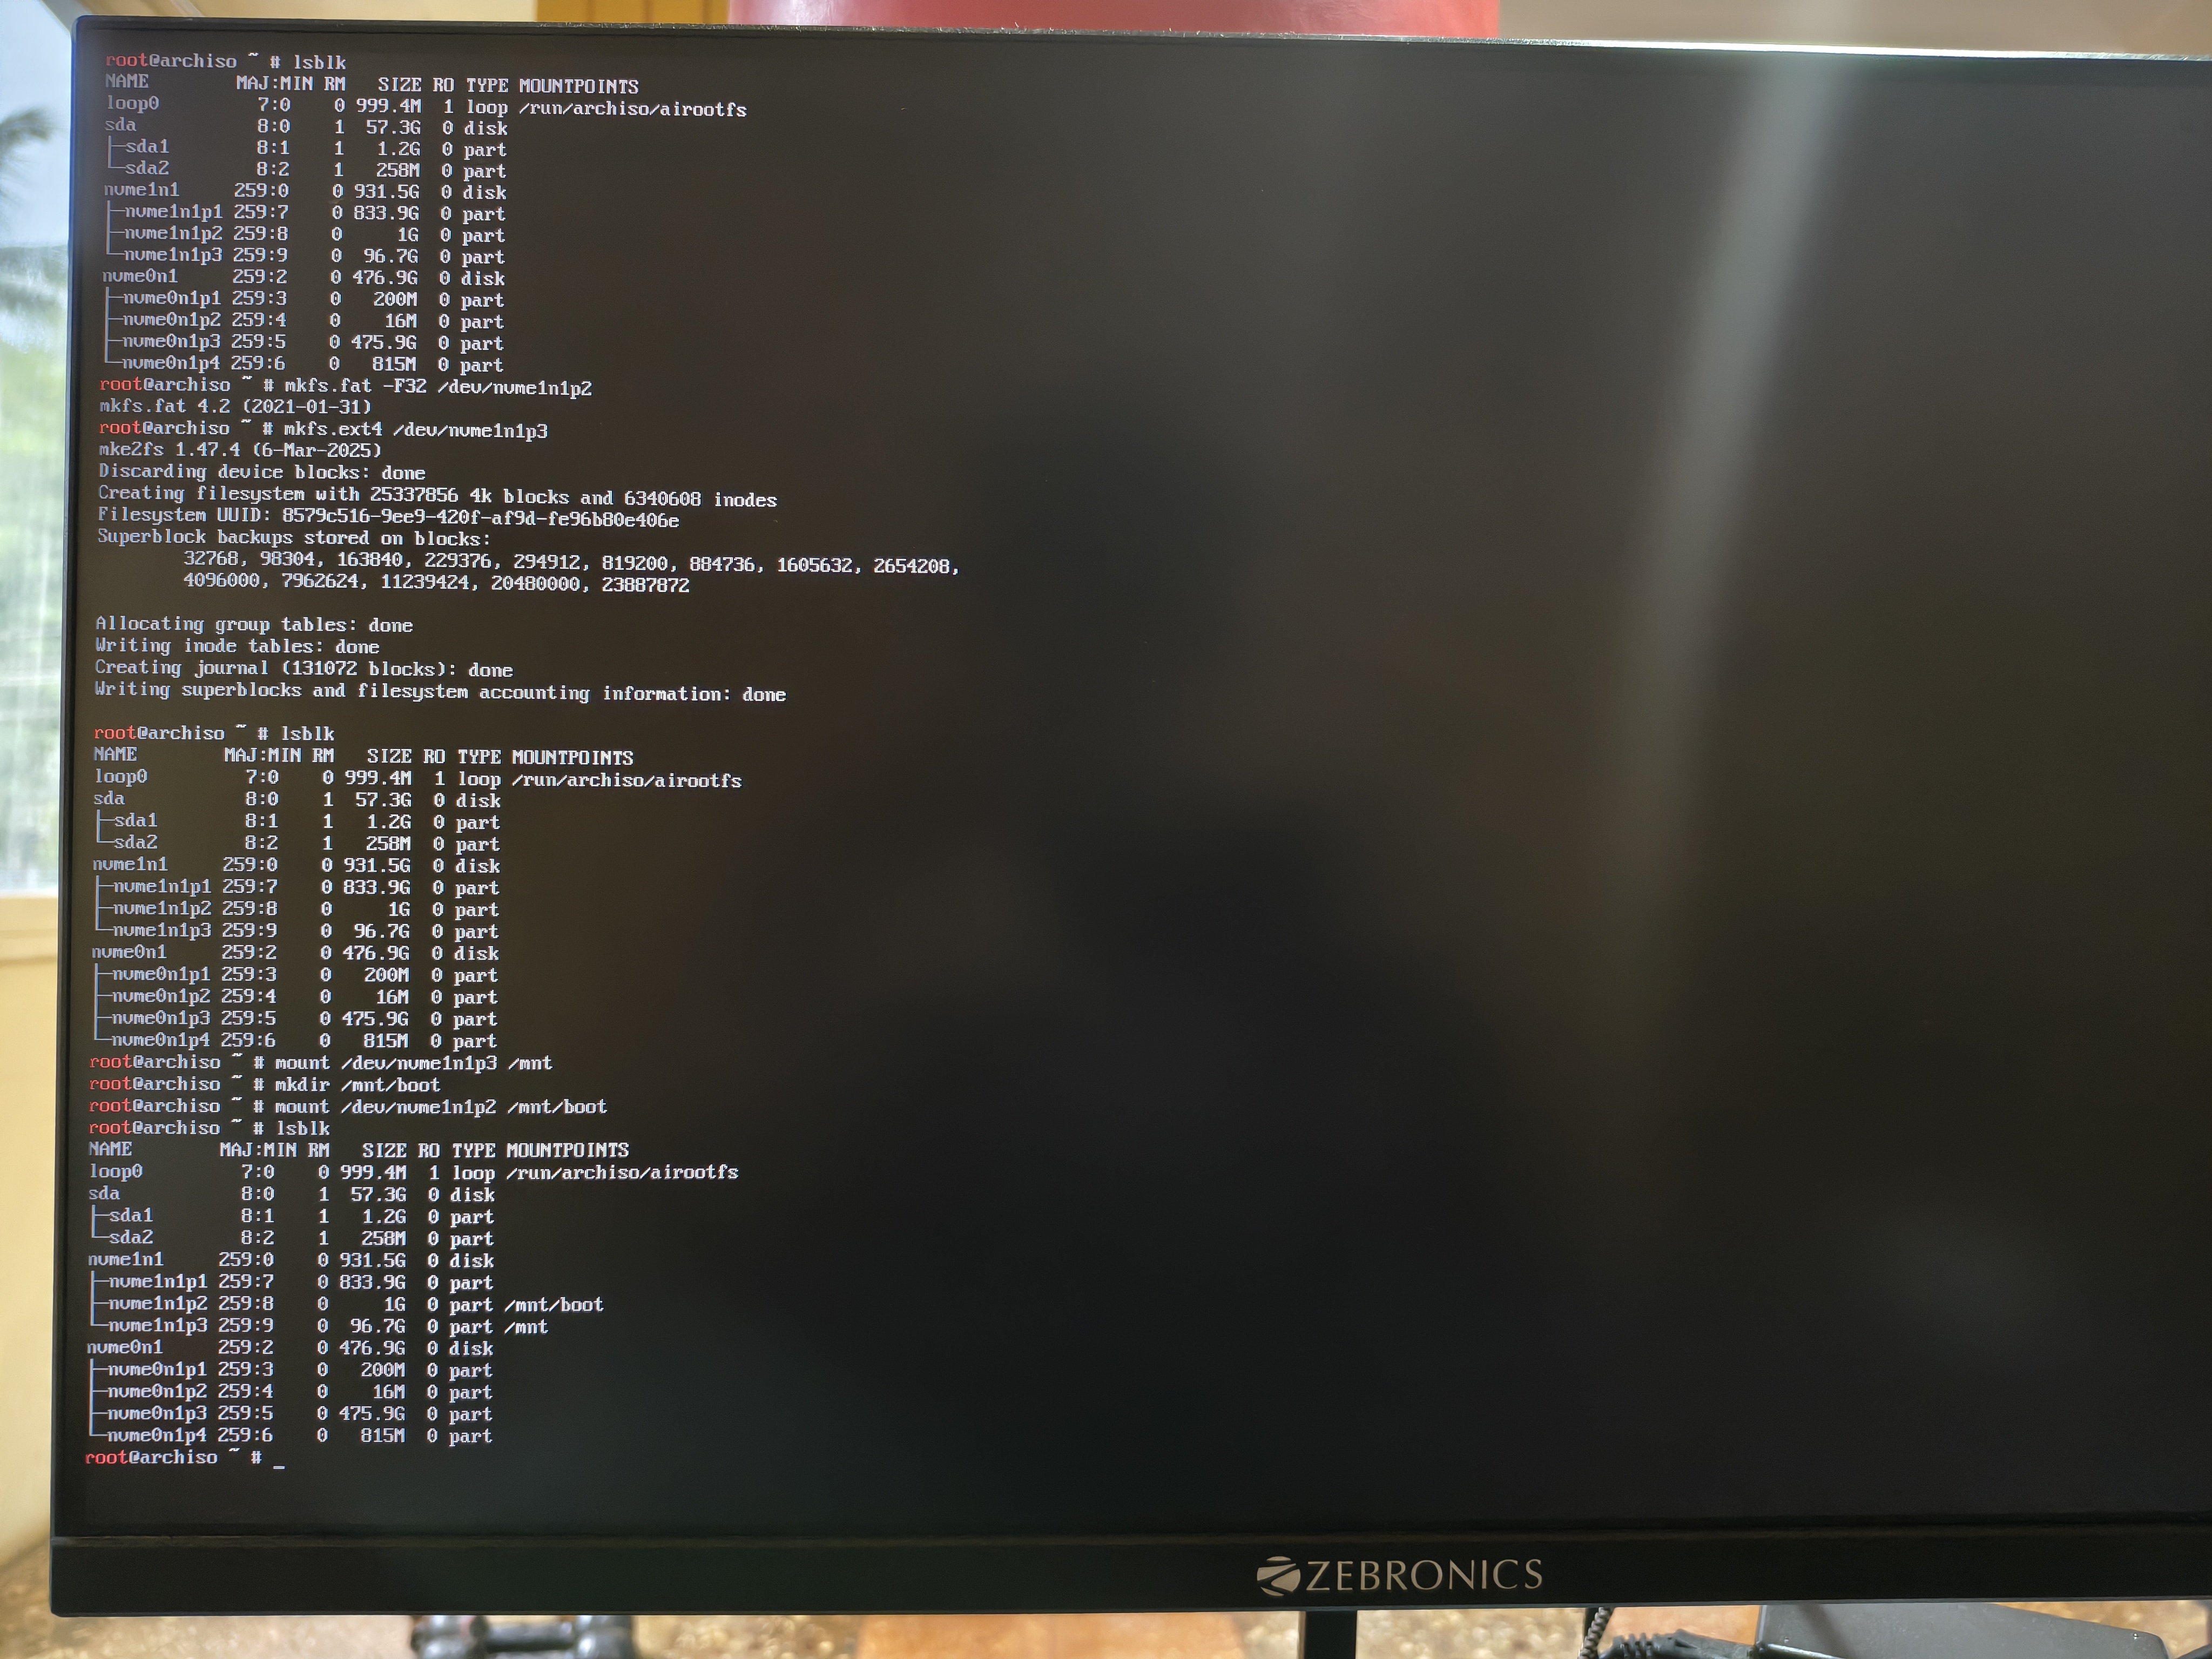
- Partition 1
Creating and mounting the file system
- Use this command to make a FAT32 out of your 1GB partition:
mkfs.fat -F32 /dev/<your-partition-name> - Use this command to make a ext4 for the rest of the data in your partiton:
mkfs.ext4 /dev/<your-artition-name>
- Use this command to make a FAT32 out of your 1GB partition:
Mounting the partitions
- Mounting the main partition (the larger one):
mount /dev/<your-partition-name> /mnt - Mounting the EFI partition (the smaller one):
mount /dev/<your-partition-name> /mnt/boot
- Mounting the main partition (the larger one):
Verify the install by using
lsblkagain and checking the correct mount locations.
Running the Archinstall script
The Archinstall script is a automated arch installer with minimal user input an a cli to do all the hardwork for you. You’d need to ensure that the disk configuration is already done before proceeding here.
- Running the
archinstallscript- Just type in
archinstall
- Just type in
- You’d be presented with a CLI like this
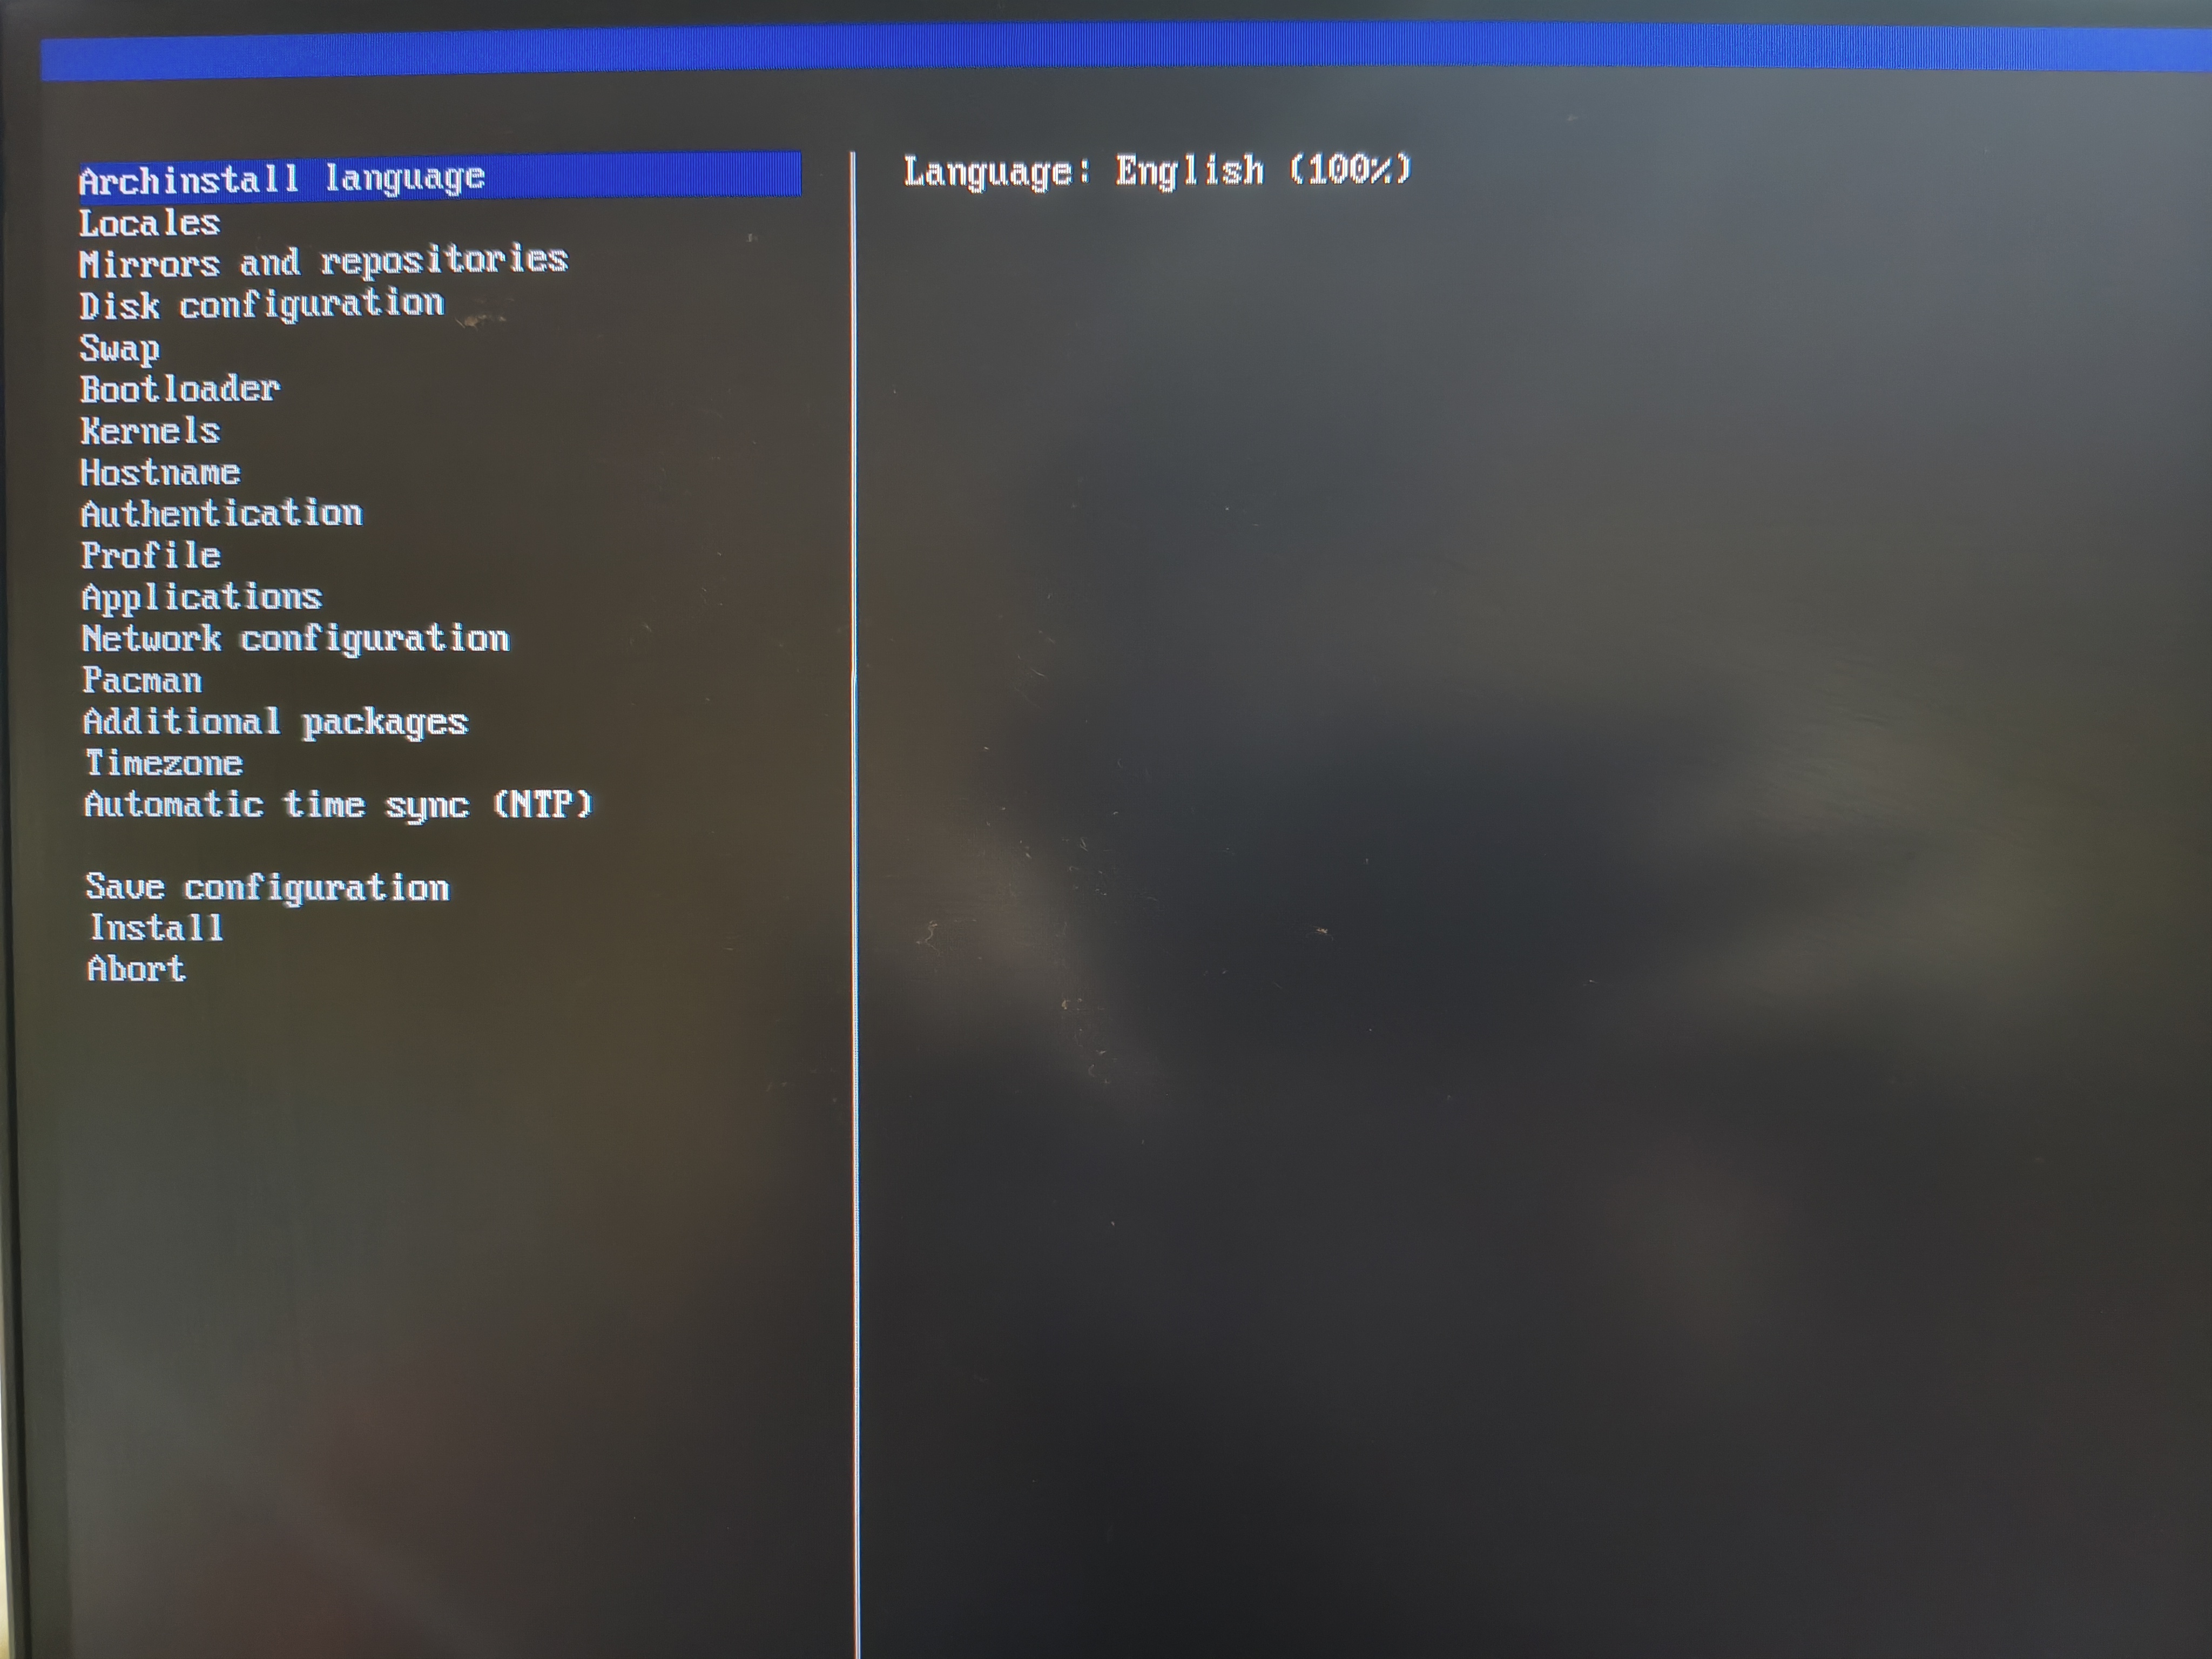
- Select the archinstall language that you want
- Select your apt locale
- Mirrors and reposiotries - add your location or the location of the mirror you wanna add
- Disk configuration
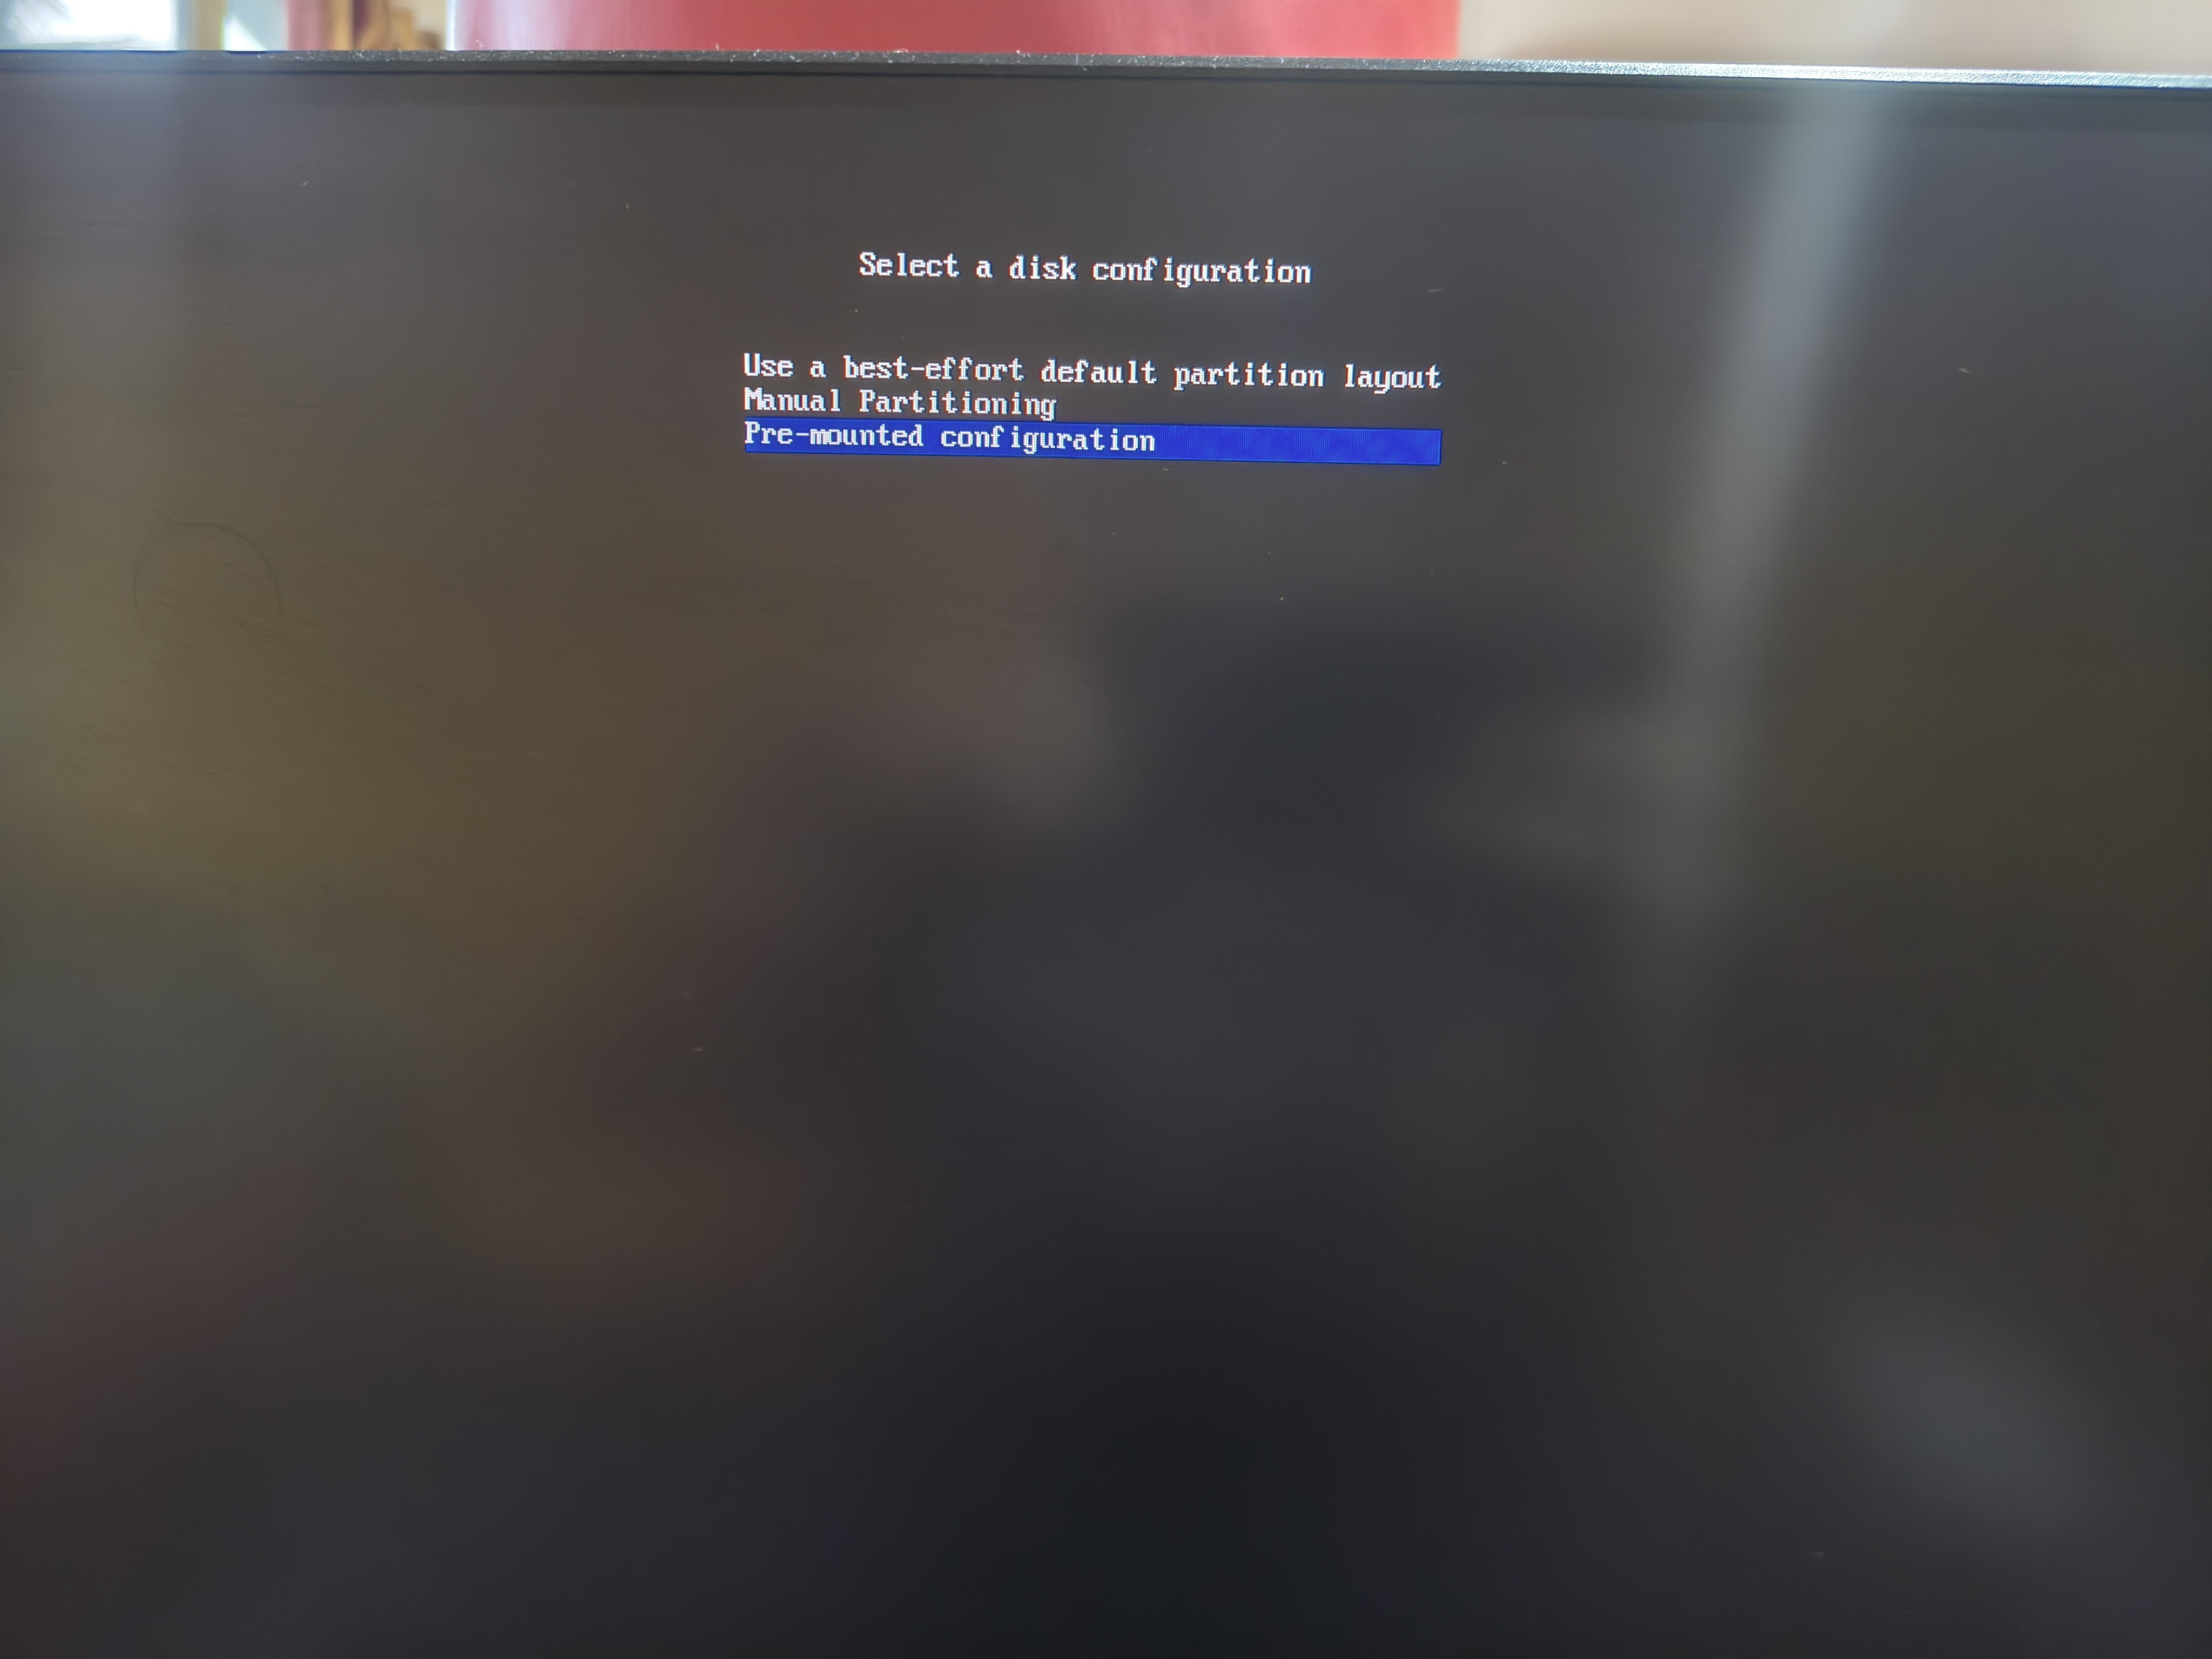 You’d see a menu like this, since we had preconfigured our storage we can go ahead and use Pre-mounted configuration
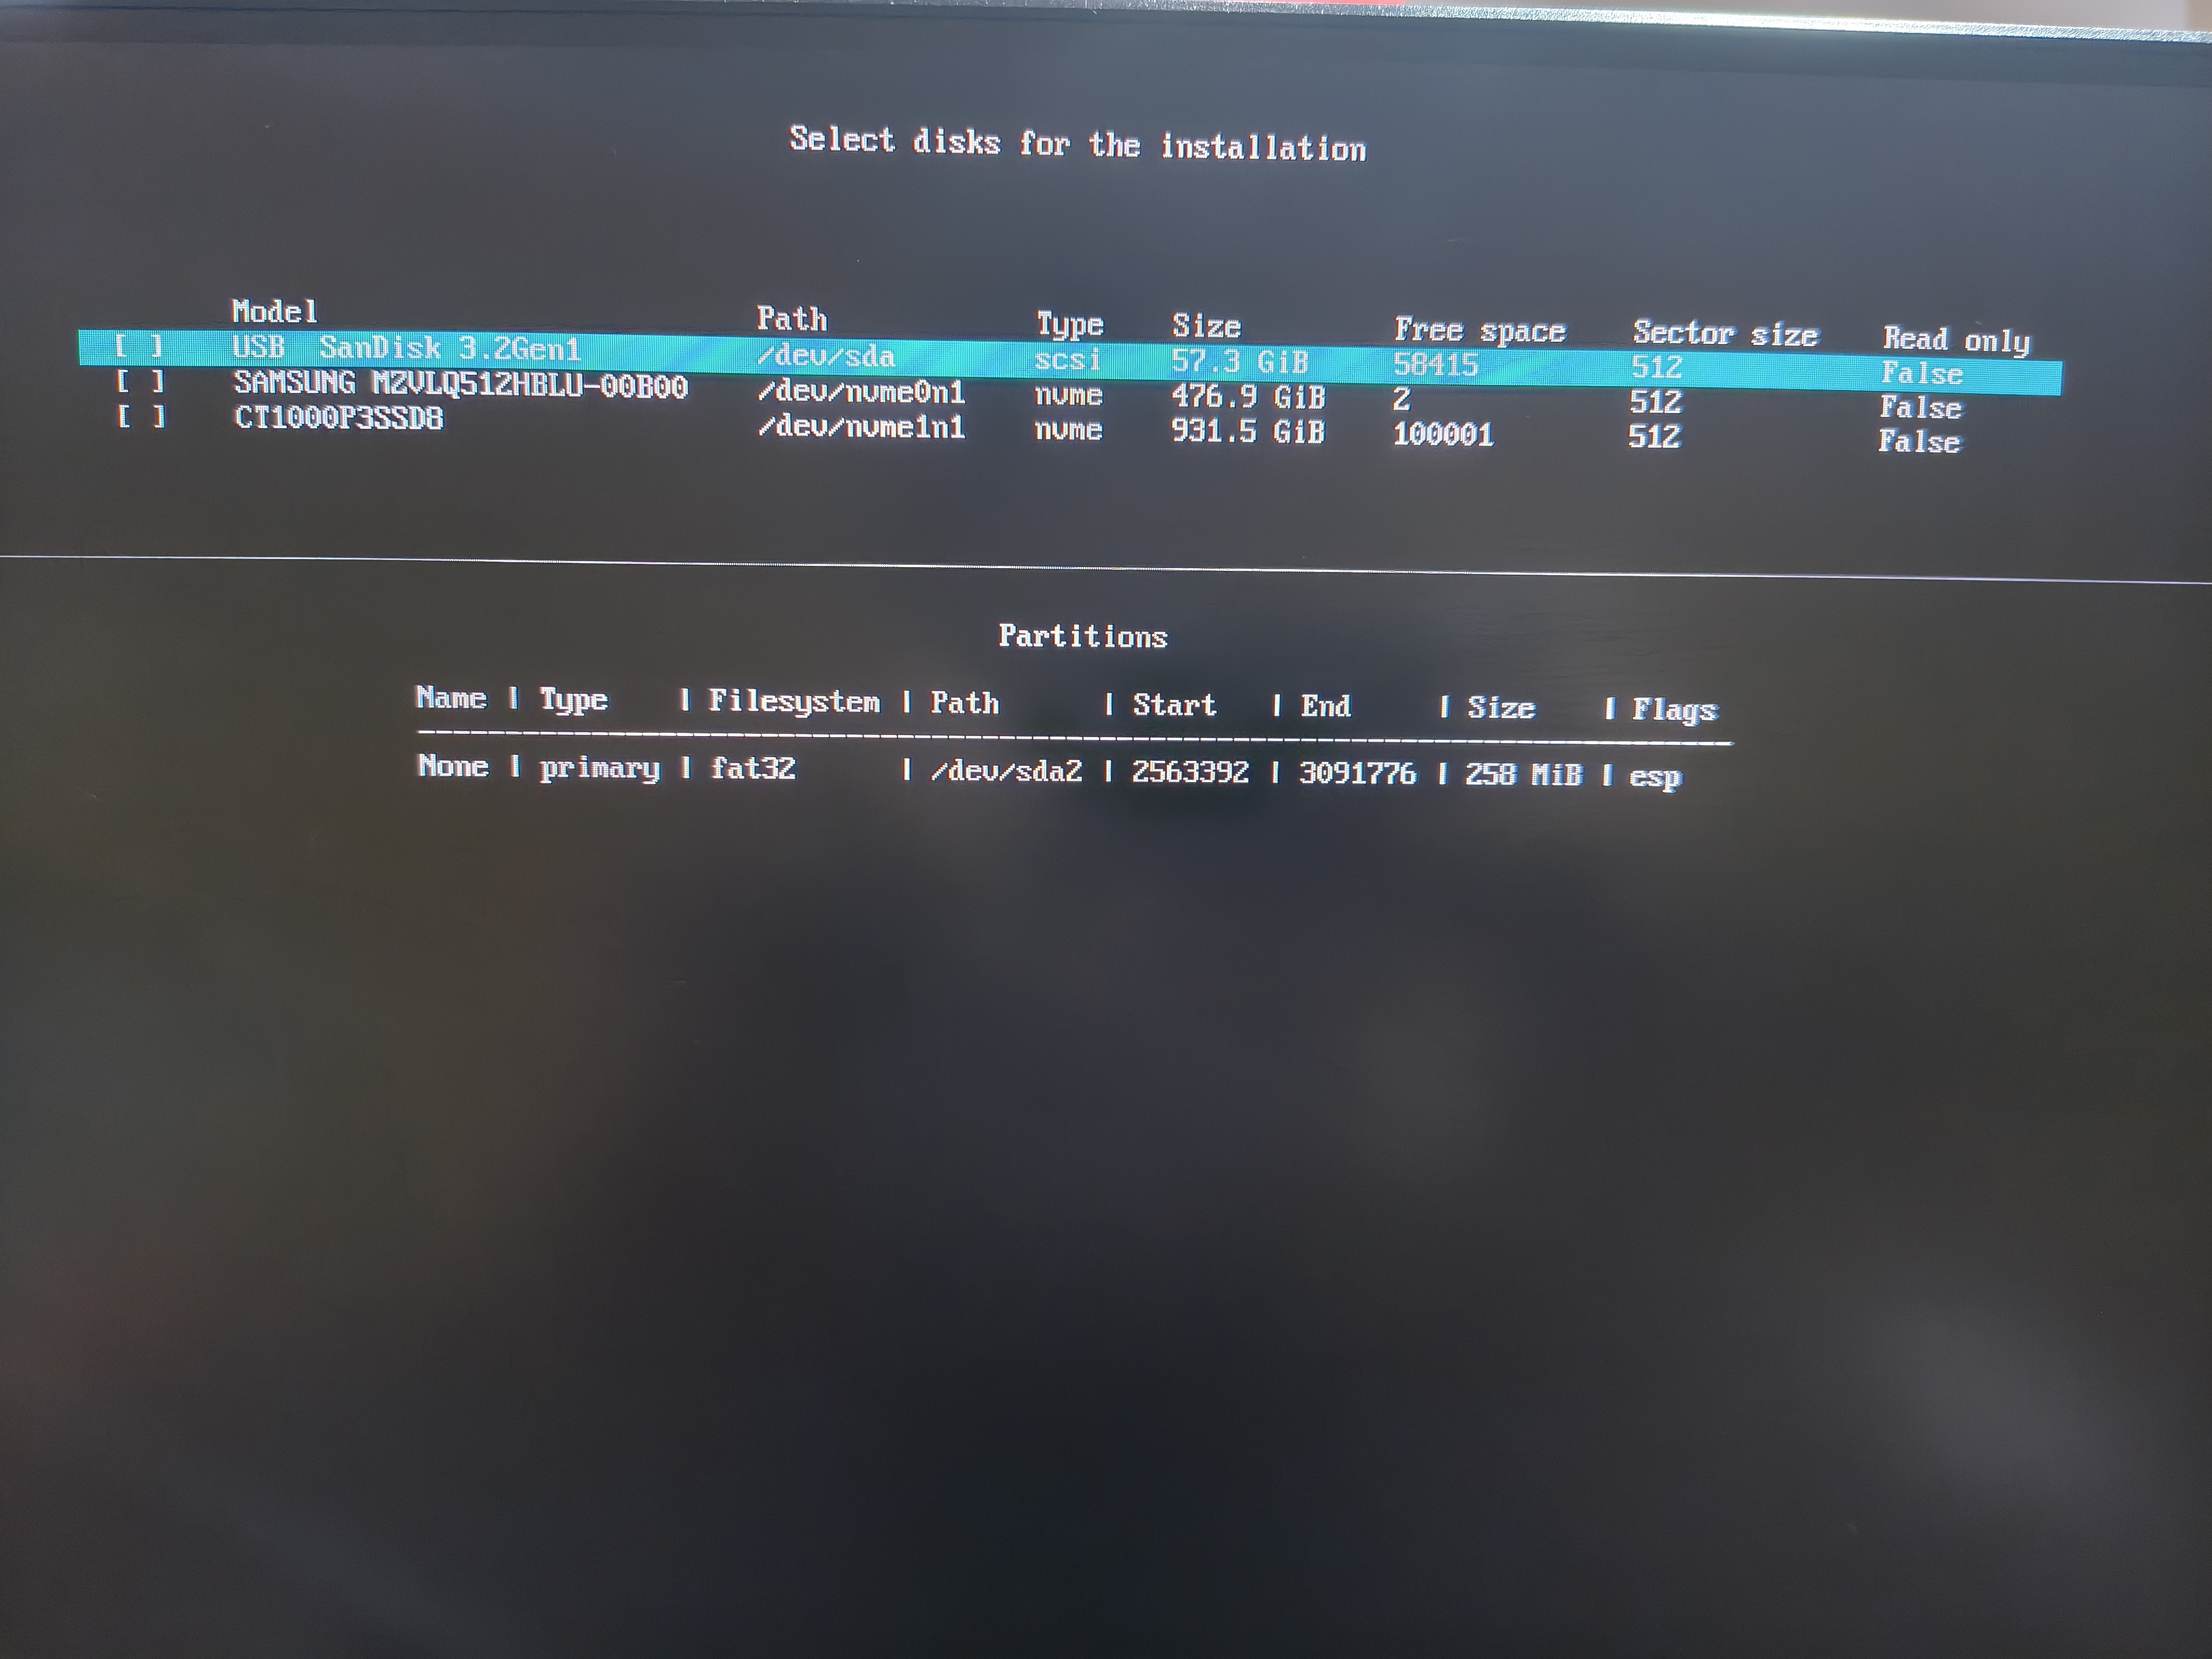 Select your disk where you want to install
 - Other settings
- Enable swap
- Add your hostname and host password
- Add your username and password and set it as a sudo account
- Use pipewire as the audio driver
- Use linux as the kernal
- Select your timezone
- Disalbe automatic time sync if you don’t want to meddle with windows settings and DST isn’t a thing
- Within profile use Desktop > KDE Plasma (or any other install).
- Click on install
Crutial services
The initial usb boot environment will not work if not connected to the internet for installing packages and profiles. You can connect to the internet via Wi-Fi and Ethernet. Ethernet and mobile wired hotspot will work out of the box and can be tested by pinging a site i.e.
1ping google.comuse ctrl + c after a couple of pings to stop the utility.
However Wi-Fi would not work directly, so we have to use an utility called iwctl, you can click here to learn more.
Apps and user config
Pacman
Lets first see the base docs of pacman
The pacman command is a package manager used in Arch Linux and its derivatives to manage software packages. Here’s a basic guide on how to use it:
Update Package Database:
1sudo pacman -SyUpdates the package database to the latest version.
Upgrade All Packages:
1sudo pacman -SuUpgrades all installed packages to their latest versions.
Install a Package:
1sudo pacman -S package_nameReplace
package_namewith the name of the package you want to install.Remove a Package:
1sudo pacman -R package_nameThis removes the specified package.
Remove a Package and Its Dependencies:
1sudo pacman -Rns package_nameThis removes the package along with its unused dependencies.
Search for a Package:
1pacman -Ss search_termThis searches the package database for the specified term.
Show Package Information:
1pacman -Si package_nameDisplays detailed information about a specified package.
List Installed Packages:
1pacman -QCheck for Package Updates:
1pacman -QuLists all packages that have updates available.
Additional options
- Verbose Mode: Add
vfor verbose output. - Help: Use
pacman -hto see all available options.
My installed pacman packages
Zsh - Ref
Setup and install
My configuration - extensions Ref
Extensions list
- Zsh autosuggest
- Zsh syntax highlight
- You should use
- Zsh-bat
1 2 3 4 5# cloning all the repos git clone https://github.com/zsh-users/zsh-autosuggestions ${ZSH_CUSTOM:-~/.oh-my-zsh/custom}/plugins/zsh-autosuggestions git clone https://github.com/zsh-users/zsh-syntax-highlighting.git ${ZSH_CUSTOM:-~/.oh-my-zsh/custom}/plugins/zsh-syntax-highlighting git clone https://github.com/MichaelAquilina/zsh-you-should-use.git $ZSH_CUSTOM/plugins/you-should-use git clone https://github.com/fdellwing/zsh-bat.git $ZSH_CUSTOM/plugins/zsh-batNow go to the line that says
plugins=(git)and replace them with the following. The source file is located at~/.zshrc, and can be accessed throughvim ~/.zshrcornano ~/.zshrc.1plugins=(git zsh-autosuggestions zsh-syntax-highlighting you-should-use zsh-bat)A note that bat needs a package dependency also, this may be done via running the following command
1sudo pacman -S batNow refresh the shell by using
1source ~/.zshrcConfiguring the theme
Prerequisites: For some of the theme to work you’ll need to install a nerd font something like
ttf-nerd-fonts-symbolswould do the trick. This can be installed throgh1sudo pacman -Syu ttf-nerd-fonts-symbols
For this install we are going to use powerlevel10k, via this command
1git clone --depth=1 https://github.com/romkatv/powerlevel10k.git ${ZSH_CUSTOM:-$HOME/.oh-my-zsh/custom}/themes/powerlevel10kthen we are going to configure the
~/.zshrcfile to reflect the theme, this can be done via opening the~/.zshrcfile and paste the followingpaste the following in place of
ZSH_THEME="robbyrussell1ZSH_THEME="powerlevel10k/powerlevel10k"
NodeJS: For installing the 20x version we are using the following command
1sudo pacman -S nodejs npmPip: A package manager for python
1sudo pacman -S python-pipHugo: A static site builder
1sudo pacman -S hugoLibreOffice: Documentation and productivity suite
1sudo pacman -S libreoffice-fresh # or libreoffice-still for stable versionNeovim: CLI based text editor
1sudo pacman -S neovimOptional: I’ve set up neovim kickstart to quick start neovim.
AUR
Setting up
yayand basics of AURFor the initial setup of the AUR first you need to update all the packages inside it this can be done via. Then install the packages. This can be checked below. Ref.
Firstly we need to install
yaywhich is a helper for installing software via AUR this can be done by the following commandsif the program doesn’t compile then you may need to install the following dependencies (optional)
now we can install yay via
pacman1sudo pacman -U yay-12.4.2-1-x86_64.pkg.tar.zstthe install can be checked and verified via
1yay -hMy AUR packages
Note: Packages installed via
yaymay not needsudoprivalages
Additional settings
Battery threshold
In a laptop where the laptop is always plugged in it is important to set up a battery threshold to preserve the battery life. In KDE Plasma 6 this feature is already baked in, however in Plasma 6.2.1 (the one which I’m using the time of writing) resets the threshold value on every boot, this can be fixed in the following way. Ref.
To achieve this i did the following steps
Create a service - I named it
kde-battery-threshold-workaround.service, this can be located in/etc/systemd/systemPaste the following in it
1 2 3 4 5 6 7 8 9 10 11[Unit] Description=Set Battery Charge Control Threshold [Service] ExecStart=/usr/bin/sudo /bin/sh -c 'echo "60" > /sys/class/power_supply/BAT1/charge_control_end_threshold' # you can change this line accordingly to your battery dir Type=oneshot RemainAfterExit=yes ExecStartPre=/bin/sleep 10 [Install] WantedBy=multi-user.targetRun the following commands
Git setup
GRUB setup
GRUB by default may not show all the OSes listed in the computer, and will usually skip the Windows OS and skip to direct Arch installation. While you may still enter windows through the motherboard’s boot manager it’s better to have the option to boot into windows through GRUB itself.
- Install os-prober and NTFS file system support
1sudo pacman -S os-prober ntfs-3g- Open grub configuration
1sudo vim /etc/default/grub # or use nano- Uncomment this add, or if the comment is not present add this line, typically present in the end of the file of GRUB configuration
1GRUB_DISABLE_OS_PROBER=false- Remake the grub configuration
1sudo grub-mkconfig -o /boot/grub/grub.cfg- Reboot the system and check if the windows settings pops up